Showing posts with label TWATS. Show all posts

Monday, 2 June 2025

Stop me if you've heard this one before...

For those out there who enjoy a touch of modern wargaming, there seems to be a common thread about boring games where a number of Challenger tanks engage an overwhelming number of enemy tanks and take down the lot. This can be quite tedious, at least for one side, if not both, so when I offered to jump into the chair for our next meeting of the TWATS using a partially amended set of Team Yankee rules that have been trialled before, that was the outcome I wished to avoid. 

Then Shaun emailed me the night before. Did I fancy adding a 28 tank T54/55 battalion and a 10-strong T62 company to the mix? Well, that kind of sunk my original plans, but seeing that huge numbers of 15mm vehicles can look damned impressive on the table, I gladly accepted the offer.

So it was that on the Saturday afternoon, Shaun, Steve, Paul, Andy and myself congregated at The Blue Bell in Kip Hill, who as well as offering good quality ales and a fantastic array of Turkish and British dishes, also host the Forlorn Hope Wargames Group. Sadly, the club itself will be closing in August so future plans are up in the air, but it's not the first time the TWATS have been venue-less, and we'll see what happens. 

Steve handled the Royal Marine contingent, and Andy presided over the main armoured force of six Challengers, a quartet of Scimitars, and some Warrior-bound infantry. For the opposition, Shaun was going to play with his frankly ludicrous amount of armour, and Paul would have total rights to the rabble of militia and the main striking force of a reinforced Republican Guard battalion. 

The premise was simple: the British were acting as a trip wire to prevent the Harraqui armed forces from invading their peaceful neighbour of Huwait (not, incidentally, a Geordie asking someone to slow down). The British could deploy their main force within 12 inches of their table edge, the Harraqui's the same from their end. The actual border was about 14 inches from that edge, and there was a border town on the Huwaiti side that Steve promptly decided to fill with his commandos. Their trio of support WMIK's were positioned just outside of the town. The British also had a strip of mines across a section of the table (the location of which was unknown to neither Shaun nor Paul), as well as an off-table battery of 8 105mm Light Guns. 

The Harraqui plan was simple - use the militia to push the RM's out of the town, and basically smeg the British with a full frontal assault using the older vehicles to mask the approaching Republican Guard heavies. 

And, to a degree, that plan worked to begin with. It took a couple of turns, but the militia performed better than expected (what would you expect for a rabble, even if they did have four T55's attached for the LOLs). Half of them took a smacking from the Light Guns after being caught out in the open, but once the town was cleared, their T55's restored honour by taking out a handful of the retreating British light-skinned transports as the latter raced for home. 

Before...

After...

It was not all one-sided, and the trio of Milan-wielding WMIK's dealt serious damage to the T62 company and were nibbling away at the T55 battalion before being pushed back by the militia.  

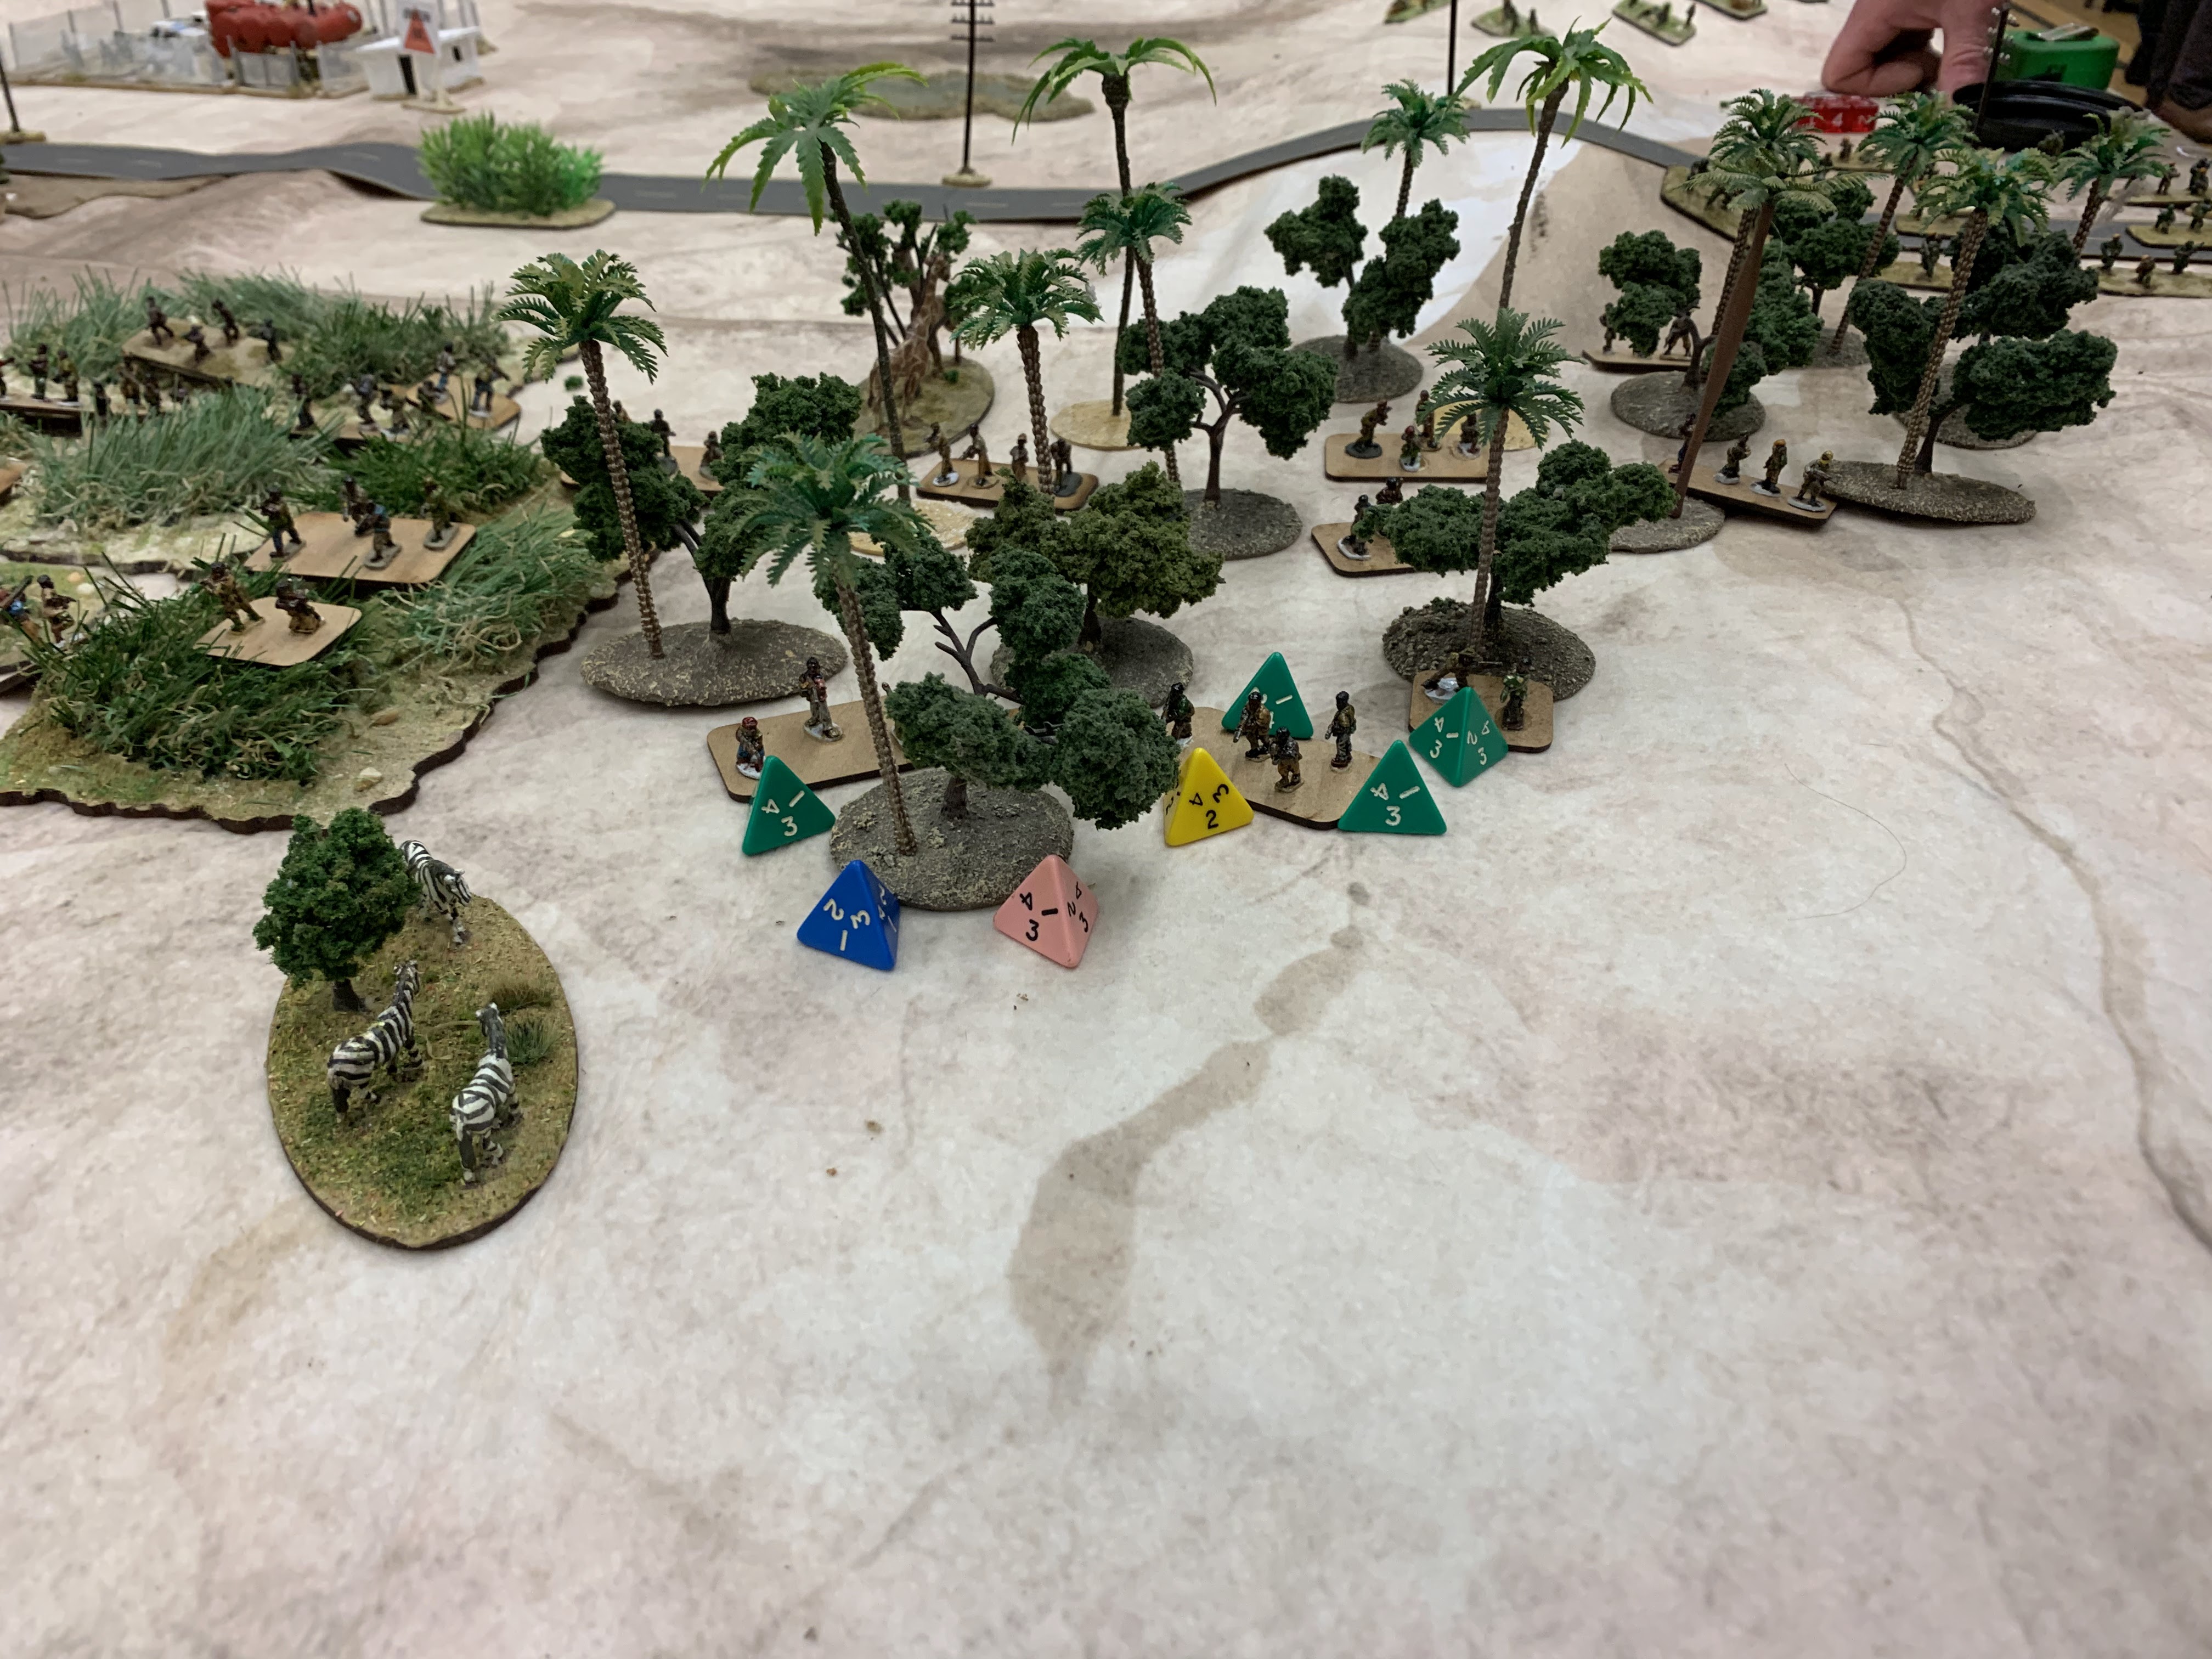
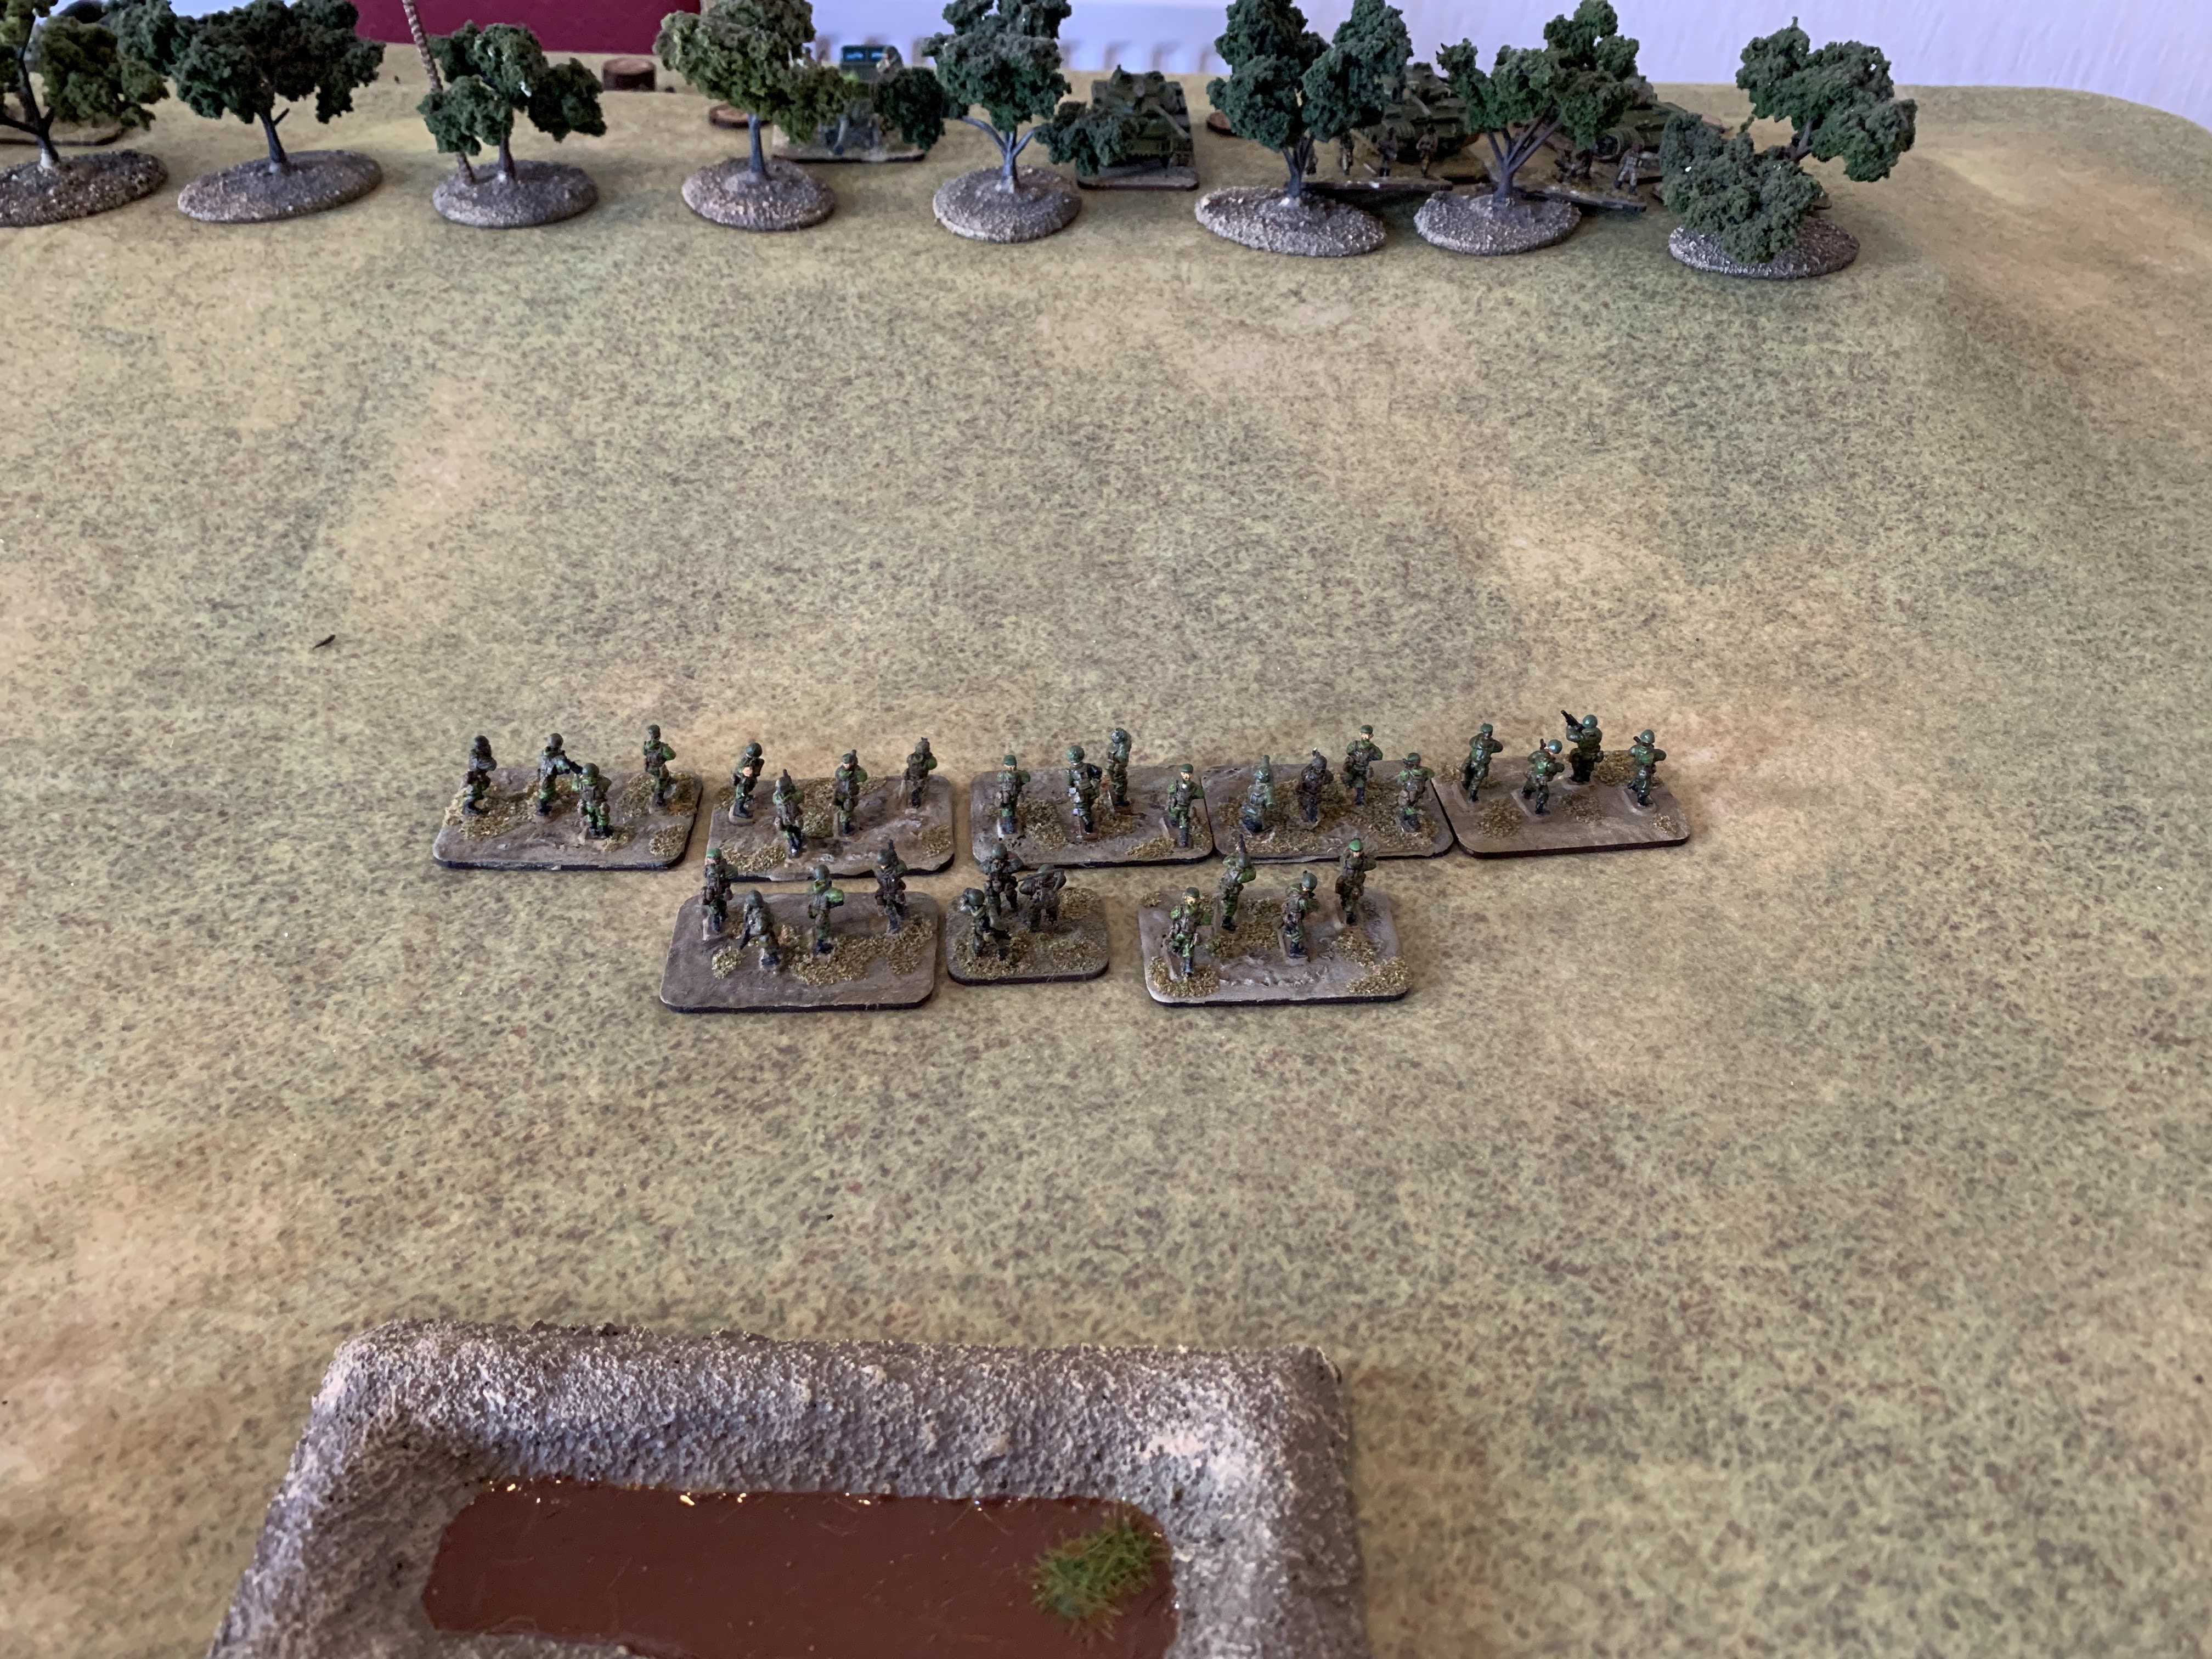
A light screen of recce Scimitars noted the approach of the T55's before turning back to safety, leaving the Harraqui forces free to continue their advance... straight over the thin minefield that the British had bisected the playing area with. Although not causing many casualties, those that did make it across were then immediately in range of the hull down Challengers. 

Each die is a vehicle casualty - and those T55's in the foreground are about to pass their deceased colleagues. 

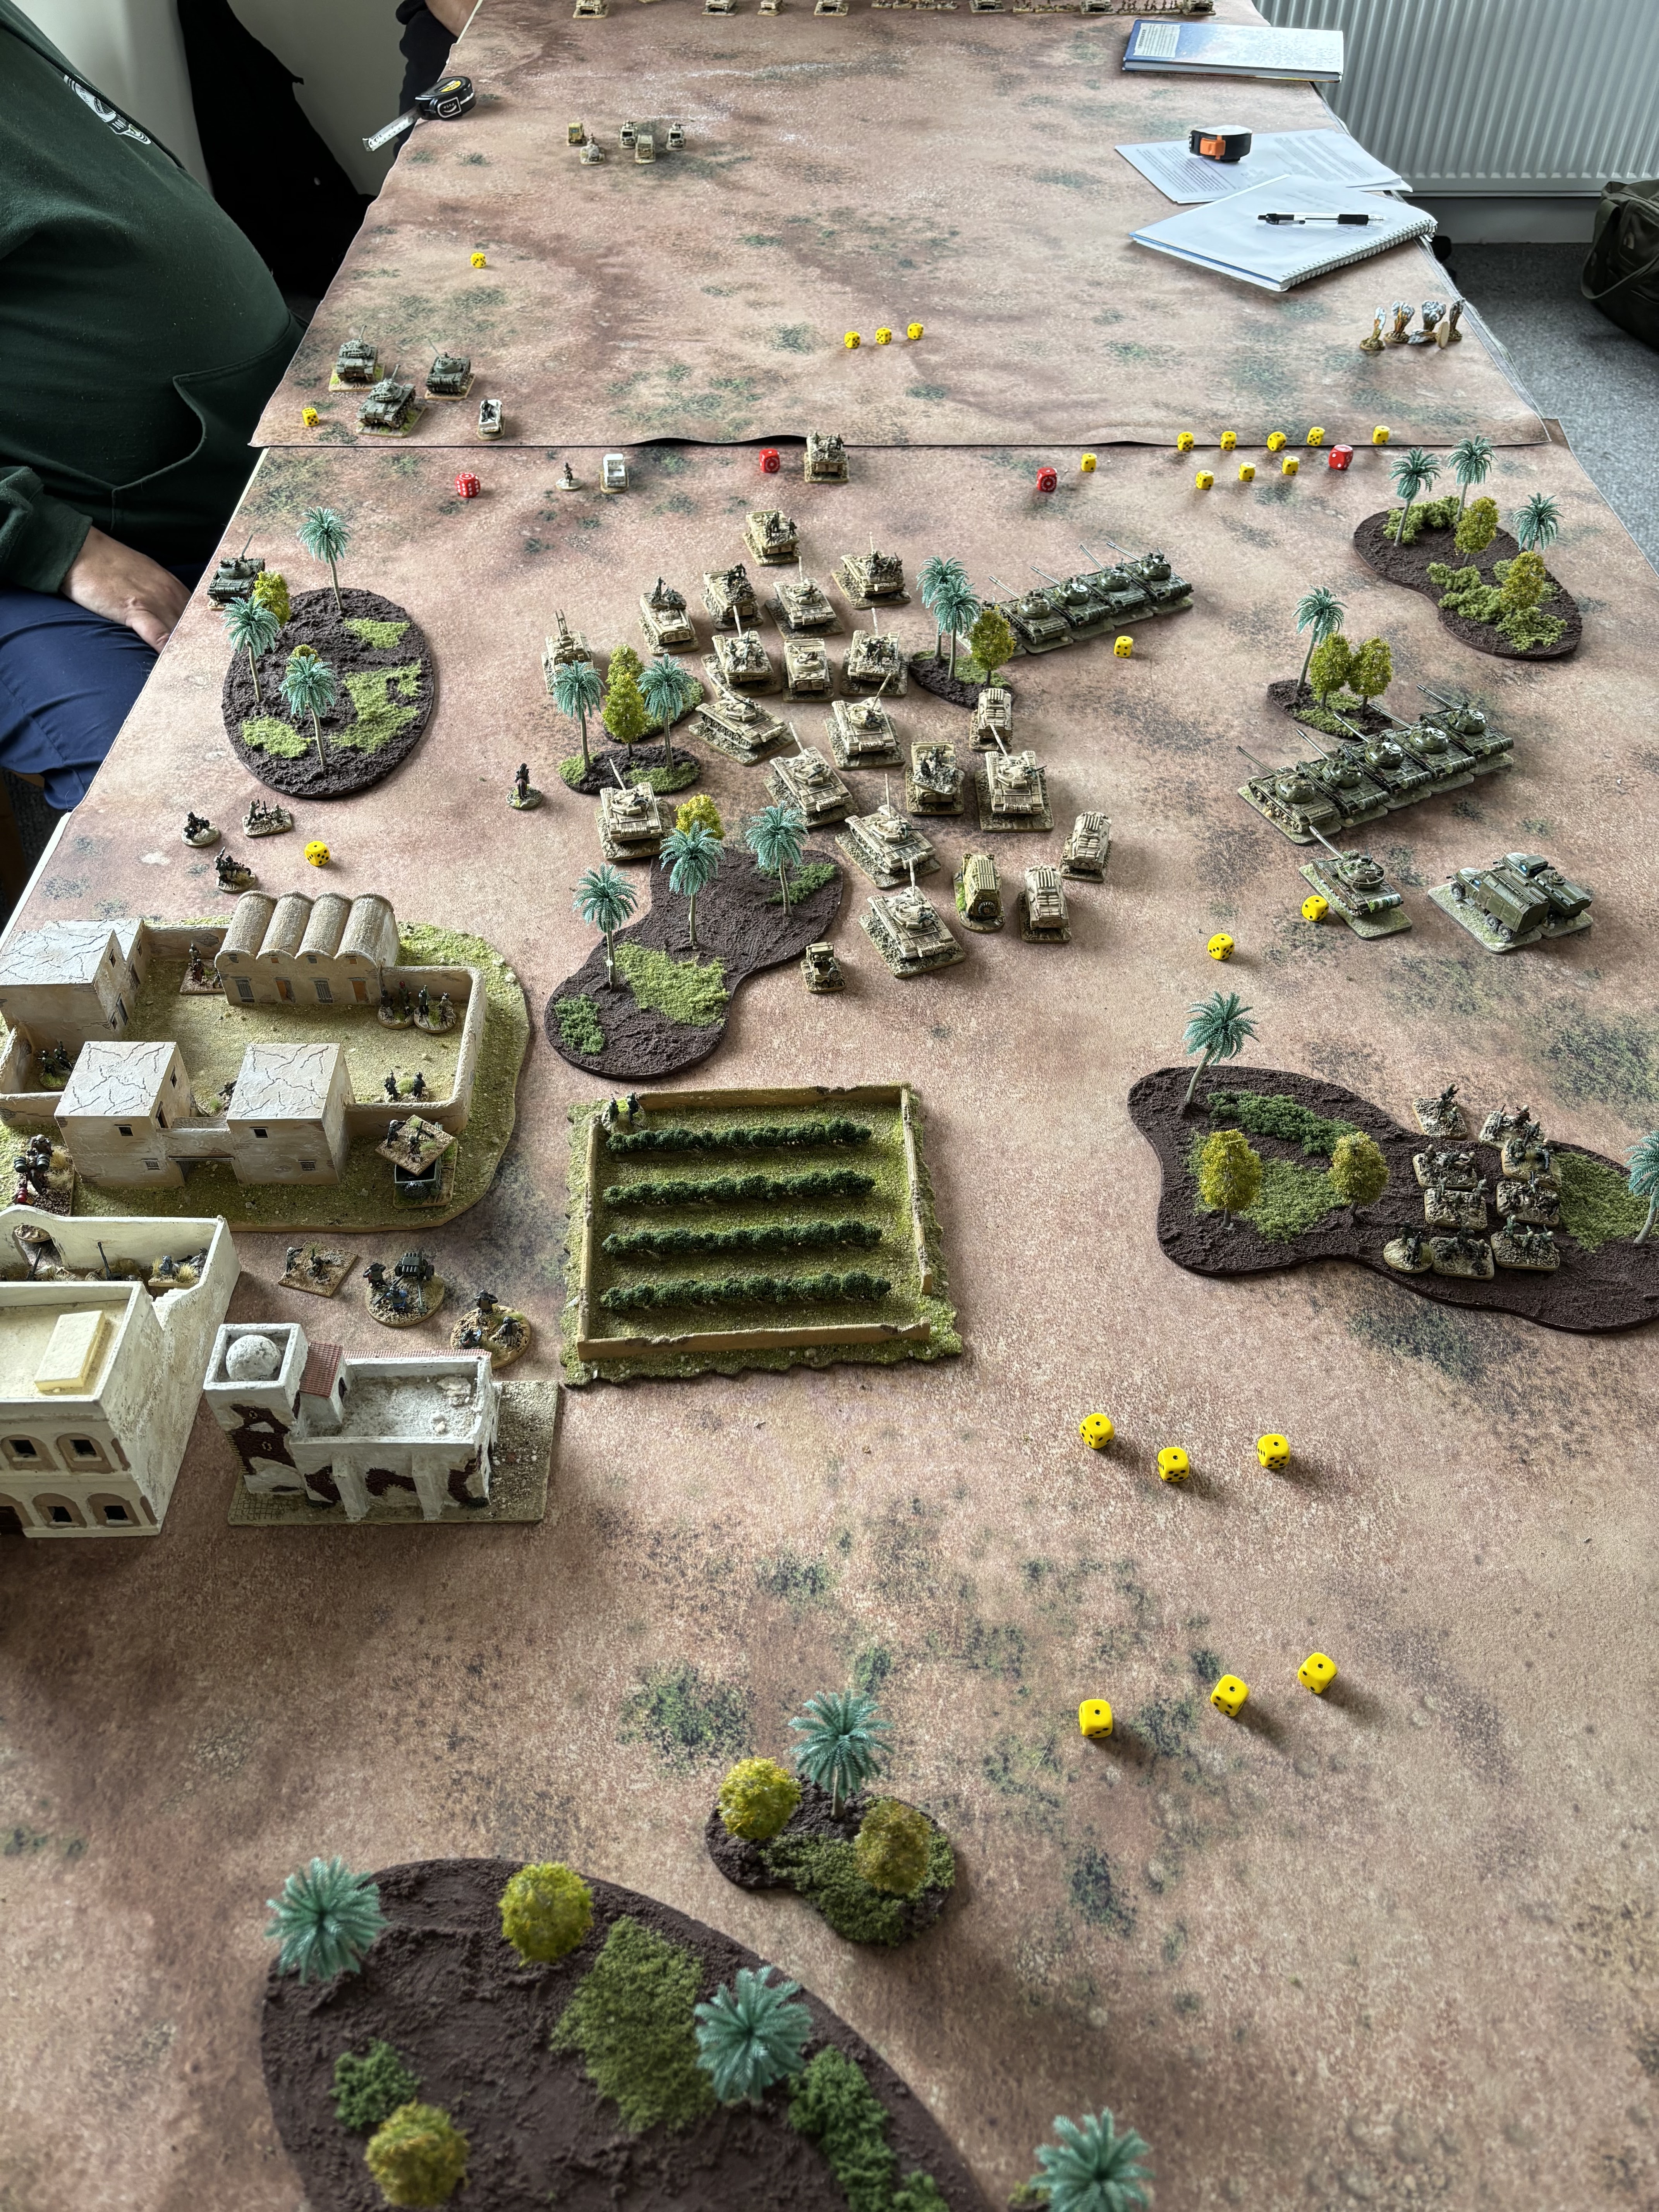
What followed next was a stunning display of dice throws, halting the T55 lads in their tracks, but given the choice of either run away and being shot, or staying just out of range, the Harraqui commander chose the latter. The effectiveness of the British fire was tailing off, but it was enough to pause the attack, and the table seemed awash with yellow (and red - we ran out of yellow) marker dice. 

This left the Harraqui forces in a quandry - what could they do in the face of the Challenger "massive" and avoid the much maligned concept of a Challie turkey shoot? Time was pressing in the real world, so the game ended there, although there was a conversation had about  could be done.

Time permitting, the best case would have been to use the Republican Guard integral ATGM contingent to sit outside of Challenger range and pelt them with missiles until two or three were destroyed. Then, a single file advance of the Guard over the minefield outside of effective British fire before regrouping, and then charging with everything. As the umpire, I'd have allowed the T55 lot to re-engage, especially given the motivational techniques available to The Great Leader! 
This was a bit of a mixed game for me - the additional amendments to cater for damaged armour never came into play (based on these amendments from all the way back in 2018), and I'm searching for a better way to handle infantry and artillery - I'm not a great fan of either in the original Team Yankee rules, but since this is a work in progress set of amends, there's plenty of time to pull in more stuff. Shaun recommended Sabre Squadron, Andy proposed Combined Arms. Both will be consulted. I also think that I need to work on the unit stats for infantry in general - again, it's a TY thing. 

There was a slightly unsettled feeling after this game, and a lot of that was to do with the quick change in scenario - some of the questions raised during this game would not have been otherwise. Whilst this did lead to some discussion throughout the day, valid points were raised that will be addressed in future, and it was good to have input. Anything that makes the game play better to the period is always a plus, hence the rather Frankenstein nature of the rules. What I will add is that in future, if umpiring a period that some of the attendees have little knowledge about, maybe some cue cards might be in order so they have a basis of knowledge about the forces they control. Another point to consider me thinks.

Sunday, 8 September 2024

An 80's Naval S.A.G.A (Surface Action Group Affair).

The last Saturday in August saw another semi-regular gathering of the TWATS and in a sublime case of history repeating itself, I was in the chair for a game of Shipwreck and once again taking advantage of Steve's collection of Cold War floaty boats. If we do the same thing for the last Saturday in August next year, this could become a tradition. 

Iiiiiiin the Red corner!!!

There were five in attendance so I'd come up with an asymmetric scenario of four British destroyers and frigates against a lone Soviet cruiser. I had not counted on Steve being busy with his brushes and bring the Americans to the table. Oh well, best laid plans and all that.

Aaaaaand in the Blue corner!

Instead, we had a straight forward slug-fest, albeit it with a little room for tactical shenanigans. Andy and Shaun took control of the Soviet surface group made up of a Kirov-class battlecruiser, two Sovremmeny-class destroyers, an Udaloy-class destroyer and a Krivak II-class frigate. Paul and Steve had the American fleet, centred around an Iowa-class battleship, two Ticonderoga-class cruisers, a California-class cruiser and a Perry-class frigate. Yep, each side has a sacrificial target, but would they use them wisely?

In the middle of the area of operations were two small islands and each side basically had to get past the other. There were no aircraft to get in the way of the ship to ship combat. 

The Krivak in the distance looks kinda lonely.

The early turns were a selection of single and double moves to eat up the distance between the two forces, with the Americans switching on the Iowa's surface search radar but neither finding anything nor being detected itself. During this period, the Americans stayed in formation whilst the Soviets pushed the plucky little Krivak II out in front and eventually warmed up its radar, yet still detecting nothing. Someone had been thinking...

Turn 9 (these were very quick movement turns at this stage of the game) saw the Americans detect the Krivak's emissions and loft four speculative Harpoons from the Iowa. This led to the first combat phase, and with the Krivak beam on to the approaching US ships, it was able to use both its SA-N-4 mounts to take down the quarrelsome quartet in two combat turns (CT's). 

Back to the movement and the US go to flank speed. The Krivak got a radar fix the US's port wing consisting of a Tico and the OHP, yet still the US still hadn't picked up a hard lock on the Krivak. Even so, more missiles went a-flying. 

A pair a piece from the Iowa, port Tico and the OHP should have been enough, yet some deft Soviet missile fire (and some absolutely cracking dice rolls from Shaun) saw the last of the Harpoons downed without too much sweat, whilst the Soviet return of four SS-N-14's at the port Tico did raise eyebrows as the last of them was taken out by the cruiser's Phalanx. 

Vampires ahoy! (and guess who can't count!)

It was time for the gloves to come off, and with a good data link back to the main fleet, the Krivak did what it was supposed to do and let the gang know exactly where the Iowa, port Tico and OHP were. Each of the Soveremmeny's fired all eight of their SS-N-22's, one octet at the port Tico, the other at the OHP (overkill, I know, right?). The Kirov, having none of this "which is better?" bollocks, rippled all 20(!) of its SS-N-19's (no nukes in game, btw) at the Iowa.

Our American friends decided that the Krivak had lasted long enough, tasking the OHP to fire the last of its Harpoons at the offending frigate. Since they had not detected the main Soviet fleet, that was their only possible response. This began that last CT phase. 

The eight Harpoons were whittled away by the Krivak's dwindling supply of SAMs, with all but one of the SSM's succumbing to defensive missiles. It was at this point that the fortunate frigate ran-afoul of the flurry of fire, and some duff chaff dice rolling led to a single hit, bad enough to cripple the ship, yet not destroy it. Heroes of the Soviet Union medals all round me thinks. A tally of the remaining SAM rounds revealed a total of 2 remaining for the front mount - it was that close. 

Hard right turn, Clyde!

The American's were too busy to celebrate their first (and only) win as they had to deal with the incoming horde of SSM's. Both Tico's got in on the act, with the port ship proving the most capable as expected as they were an actual target, and it was never really in doubt that they wouldn't avoid some Sunburn issues. 

However, as the port Tico was busy saving itself, that left the OHP on their own, and that single arm launcher counted against it. They managed to down four of their Sunburn's, yet ineffective Phalanx and chaff dice rolls meant that it took four direct hits. The Krivak had been more than avenged as the Soviet claimed the first sinking of the game. Yet the game wasn't over yet...

Vampires ahoy! (With the right count now!)

There were still the issue of twenty "Shipwrecks" (not 22 according to one photo... oops! That was corrected before anything important happened though), and despite some truly fantastic AEGIS directed defensive shooting, nine still made it to CIWS range on the Iowa. Phalanx accounted for two of those, as did chaff, but the remaining five found their mark. Even with "on the fly" amendments for the presence of an armoured hull, there were too many well rolled hits and the Iowa was gone. And with that, the two fleets parted to lick their wounds, with the Soviets definitely the better off. 

Oh, Heavens Preserve us!

This was another fun game using Shipwreck and the addition of Steve's naval know-how demonstrated the benefit of having an umpire and players who know their stuff. Tis a game more than just about dice rolling. 

That being said, your humble umpire did offer both sides the opportunity to expand the game (to either or both side's benefit) via the liberal application of a fine single malt (there were several behind the bar) to the umpire, yet neither side did. Has there ever been a more fitting example of fair play from two competing sides? Probably, but hey, if you don't offer, you'll never know! Also, damn them!

A tough little ship, that one!

One thing that was was quite clear was that when the vampires were loose, there was a lot going on and much to keep track of, leading to my muttered comment of "Next time, can we do f-ing muskets?" 

I might return to the asymmetric scenario for our next naval game, but that'll be a while off yet (next August bank holiday weekend, gents?), as there are many more periods we can play with before a return to Cold War naval is warranted, and a benefit of being in such a varied group of TWATS.

Sunday, 3 September 2023

A British Tar is a soaring soul, and a very tempting target... - TWATS meeting 26th August 2023

A quartet of TWATS met last Saturday for one of our semi-regular gaming sessions, which once again saw me back in the chair (two games running, Temporary Unpaid Chief TWAT! Two!) for a bit of nautical naughtiness and a return to Shipwreck, a ruleset we have used twice before. However, instead of the usual plastic snap kits (and I'd worked on the Type-054A stats especially), we were using Steve's rather tasty little collection of Soviet and Royal Navy ships. 

In the blue corner, the Royaaallllll Naaaayyyveeeeee!

As usual, this was an umpire-led game (a daunting task requiring much support from a Singleton or two, a tasty little malt), with Admiral Andy donning his No. 3 dress, whilst Shaun and Steve began rattling off the Soviet National Anthem in true Red October (the film) style. The aim of the game was simple. The British, comprising of the Invincible (damaged so no flight operations), a Type 42 (the Sheffield), two T22's (Broadsword and Battleaxe) and a Type 21 (Amazon), had to get to the far end of the table. To stop them, the Soviets had the Slava, a Sovremmeny and two Krivak II's. Would the plucky British get away with it, or would the Soviets find the sunrays of freedom cheering them on?

In a different blue corner, the Soviet Military Maritime Fleeeeeet!

Steve and Shaun decided from the get go to split their forces, Steve taking the Sov and a Krivak II, Shaun the Slava and the other Krivak. Aiming for a pincer movement, Steve decided to approach with radars on but, as was apparent by the distance on the table, nothing was detected. A couple of movement turns saw the opposing forces approach each other, and it during movement turn 4 that Andy detected the Sov. A double movement turn (with the agreement of the players) saw the second ship of Steve's flotilla detected by the British. 

A naval Rorke's Drift: them horns look dangerous...

It was only during movement turn 6 that Steve's group detected the Sheffield and Battleaxe. Being a cautious type, Steve launched two SS-N-22 Sunburns at the Sheffield, a sensible choice given the Sea Dart present. Now we were into combat turns.

Andy went loud with his radars and Steve's ships were painted. Battleaxe launched a pair of Exocets at the Krivak, whilst Broadsword had two at the Sov. The second combat turn saw the Sheffield down one of the Sunburns, yet it wasn't all one way as three of the Exocets were shot down by the Soviets. Combat turn three saw a brace of Sea Darts deal with the errant Sunburn, whilst a trio of SA-N-7's handled the final Exocet.

Vampires, Vampires, Vampires!

Back to movement now and it was it was radars-a-go-go with everyone detecting each other. Steve decided more shots were in order so launched all four SS-N-14's from the Krivak II against the Invincible as the Sov lofted four Sunburn's at the Sheffield. Shaun, on the other hand, decided that he was sick of the top weight on the Slava. He fired all sixteen SS-N-12's at the Invincible. It was almost an afterthought for his Krivak II to shoot two '14's at Battleaxe and two at Amazon. Andy's response was to fire his remaining Exocets, a pair at each of the enemy vessels. 

Shaun turning to engage the British

Needless to say, the following few minutes of play decided the afternoon. 

Invincible and Sheffield engaged the incoming from Steve, shooting down one from each missile group. To the south, the Slava tackled the incoming Exocets and downed three out of four.

Are 16(!) SS-N-12's overkill?

The next round of fire took out the last of the Exocets targeting Shaun's duo, whilst Steve managed to shoot down three of his incoming. As for the British defence, Sea Darts accounted for another two of Steve's missiles, leaving Sheffield and the Invincible to face off against a pair of missiles each. 

One or two may have slipped through the defensive screen... eek!

With the incoming down to very short range, and a single Exocet that didn't bother the Soviet defences too much (CIWS shot), it was all on the British to survive the onslaught. Amazon was targeted by two missiles, and shot one down with Sea Wolf before handily avoiding the final one via its EW capabilities. Sheffield was less lucky, taking a direct hit and receiving heavy damage. The two Type-22's were untouched, which was handy as they would have to deal with the after effects of the barrage against Invincible. Of the final 13 missiles, two were hit by Phalanx fire, three were decoyed by chaff, and six succumbed to EW. Even then, of the two that hit, the first impact only caused light damage. Could the pride of the Royal Navy survive to fight another turn? Shaun's dice rolling said no. The final hit was catastrophic, sinking the carrier and effectively ending the game. With more SAM's and bigger guns, the Soviets ruled the table and it was time to retire to the bar and sample that Singleton (again). 

I'm not saying it was an inadequate reply but...

This was a fun game and it was enjoyed by all, despite two of the players knowing very little about floaty boats of this period. The North Atlantic setting was a nice change and, given the end result, demonstrated that quantity (of big SSM's) has a quality all of its own. I mean, sure, you'd not shoot off everything from a Slava in real life (especially the one or two missiles with added buckets of sunshine), but it was a good example of how under-gunned so to speak an RN surface action group could against a Slava. If that hadn't of been there, they would have had a better chance. Maybe a thought for a future play through when we return to Shipwreck some day. 

Once again, many thanks to Stanley Masonic for the use of the bar. Sadly, our regular victualler was on holiday (the very cheek!) so samples of Cooplands finest was our back up. 

Saturday, 5 August 2023

Cold War Commander v2 - First game and thoughts

Many moons ago (2016), we TWATS, we happy TWATS, we band of sarcastic wargamers, tried to play three modern games in one afternoon, each using a different rule sets. The aim was to compare Team Yankee, Command Decision and Cold War Commander using an identical scenario. Due to time constraints, we only managed Team Yankee and Cold War Commander (and CD was already our go to ruleset for moderns anyway), but Mr Loaf's numerative statement proved accurate, and the group opinion of Cold War Commander was that it was too dice heavy and too gamey. Last year, I picked up a copy of the second edition from the Pendraken stand at the local Border River show, yet it was only last Saturday that we finally got round to giving them a try.

So it was that five of us (almost a full twattery) arrived at our now usual venue with the idea of trying a simple scenario to see how the basics worked. Being in a bar, there was the odd pint of Moretti consumed, as well as the usual excellent beef butties and chips from Ros in the kitchen. Andy and Paul played as the British, whose sole aim was to get to the far end of the table. Steve and Shaun were the opposition, located behind some hills and a small village, and tasked with kicking seven shades out of the British. Note that there was no overall Commanding Officer present on either side (deliberately so), so there was no Hail Mary roll (with attached penalty) for any of the players, although they didn't know this as I forgot to tell them. Oops!

The scenario dictated that the British should go first, so Andy got things started by bringing his Scimitars forward for a recce. Shaun, sensibly thinking that flank shots against the Challenger 1's he knew were coming were the only real option he had, rolled to get this T72's onto the hill. Seven or less, he rolled an 8. The tanks stayed put. The BMP's he controlled were more successful and promptly took to the top of the hill. Steve wanted to get his BMP's closer to the action, and also rolled an 8 when 7 or less was the goal. He did, however, get his infantry sorted with a handy double 1 and moved them into the village. Caution saw him keep his T-72's in reserve. 

The next British phase saw the rest of their forces come on to the table, Paul commanding the Warriors and heavy support platoon. Between the two of them, there wasn't a duff dice roll to be had by Andy or Paul and they swiftly got themselves sorted out. Shaun, on the other hand... His BMP's thought action was needed and took shots at one of the Scimitars (a miss) and an ATGW shot at one of the Charlies. Two hits, two saves. Compounding this lack of effect, the T72's failed their command roll again. Steve switched his problems around this turn, the infantry failing their roll but the BMP's finally entering the town. 

After victualling (thanks again, Ros!), the next British phase saw the Scimitars have at the BMP's on the hill, suppressing them but failing to kill either despite a number of hits. Andy managed to get two of his Challenger's on to said terrain feature and engage a couple of Shaun's T72's, neatly suppressing them but killing nothing. The supporting infantry in their Warriors moved up, whilst the support platoon de-bussed to set up their mortars. Steve, being the sneaky type, decided to bring his BMP's into a nearby "wood". Shaun attempted to respond to the British attacks and spectacularly failed the command rolls again! It really wasn't a great day for these guys, but at least they lost their suppression markers at the end of their active phase.

What ended up being the final phases of the game saw Andy fail to command the Challengers, although he did get his Scimitars out of the way to let the Warriors advance onto the hill. Paul rolled a double six, the resulting blunder seeing the support platoon make a half move towards the enemy. Oh dear. 

In what was a perfect example of how horrid a day Shaun was having, both the T72's and BMP's failed the command rolls (10 and 11 respectively). The final ignominy of the game came from Steve. His BMP's failed their roll, and it was only with the intervention of the umpire (moi) to say that if he moved his tanks forward a bit, he could have a couple of shots at the approaching pair of Challengers. Scoring three and five hits respectively, maybe this reserve tank force could do something worthwhile. As it turned out, Andy's dice rolling saved each and every one of those hits. Other than some scratched paint, no evidence remained of this final attack.

As a test run of this new version of Cold War Commander, the game was considered to be decent enough. Things flowed quite smoothly, and the general consensus was that they are definitely worth another bash. I haven't compared the two editions yet, and time may preclude me from doing so for a while, but our main take from this game was that we now have another moderns ruleset that can come out to play in the future. I'm still not sure on the hits basis for attacks, as actually knocking out the enemy seems rather difficult. It's the opposite issue of Team Yankee (BANG! You're dead!). Another couple of playthroughs are needed and then we may give consideration of tinkering with the processes. As for the ruleset itself, it's a good quality book with plenty of pictures for those who like such things and a handy range of worked examples of the main mechanics. Army lists for the British, Soviets and Americans are included, with others available via the Pendraken Forum. You'll also find a Quick Reference Sheet and optional rules here as well. 

If Cold War Commander interests you, check out the Pendraken website here where you can pick up a copy as well as view their range of 10mm moderns. We used Andy's 15mm collection for this game and the rules do adapt to scales rather well. Check out the Old Glory website here for their 15mm Command Decision range.

Tuesday, 13 December 2022

The Battle Of St. Marie Claire - Demo game report

It was the Battleground wargames show in Stockton a couple of weeks ago and the Tantobie Warfare And Tactical Society were on hand to run a demo game. Making a change from the usual black powder (not the ruleset this time!) and horsey shenanigans, we were off to modern day Africa. Shaun provided the toys and I was running the game using Team Yankee (with amendments as used in previous games and a few specifically for this one). I apologise now for the terrible butchery of the French language that follows...

See that sign? That's us, that is.

The former French colony of Sans De Maquillage. Famed for many things (including its radio telescope, Le Cosmo), this former colony gained independence in the 1980's and was rather happily providing a steady stream of healthcare products to the international market. Sadly, rebel forces have been active in the interior (and we're not talking dodgy cuisine either!), and have occupied an industrial site near the town of St. Marie Claire, one run buy the ever-present Oyston Industrie. The hyaluronic acid ponds were also captured and an urgent email was sent by Andre L'Ponsonby Copiste (blame Google Translate for that one, Andy!) to the French Government to organise their recovery.

As it's Team Yankee, you have to have a line up of vehicles.

Before we begin, let me tell you that this was not your normal Team Yankee game. There were no points lists, just a "shove everything on the table" order, which meant the table was going to look rather busy as the game went on. Andy and Shaun led the French who had the bottom third of the table. Jim commanded the rebels in the top third (along with the facilities), whilst the middle third was left bare... or was it???

If you go down to the woods today...

The French started off with a dash to the (fordable) stream, a wise move as there was naff all cover on their side of the table. They didn't take long to reach it, at which point the sneakily hidden militia popped up with the chant of "Come and have a go if you think you're hard enough!" En Français, naturellement.

Got to love a bit of self promotion.

This was where it started to go a tad wrong for our intrepid soldiers, as RPG fire quickly shredded a couple of VAB's belonging to the Marines and the left wing (the Parachute Hussars) found that their ERC-90's were armoured only in the sense that a potato gun couldn't destroy them... at least at the ranges Jim was firing from...

That bit at the top of the picture looks distinctly bare of soldiers... for now.

The rebel response was to push up their T55's and thus ensued a to-ing and a fro-ing. Saving rolls were very much in order as both sides had the guns, but not the armour. Still, weight of numbers began to tell and the militia were thinned out once Shaun had brought up his Mephisto anti-tank vehicles. HOT rounds ahoy as the remaining rebel T55's from the first batch were summarily dispatched. 

The local wildlife seemed distinctly unfazed by the events around them.

In the centre, things were more delicate, as the dug in militia were causing no little suffering to the Marines and Legion troops. Artillery and mortar fire came to the rescue and after several turns, the French had gained the heights and, more importantly, a base of fire. Of course, this just meant they were now face to face with a ton more militia in the grasslands to their front and in the wooded area to their right. The local fauna were quite dismissive of this. 

A herd of French reinforcements sweeping majestically across the plain.

On the French right, the advance to the stream was unhindered and they left it for Jim to approach. A rapid volley of rifle grenades from the centre and the right flank whittled down the rebel forces, as did some decent indirect fire from the mortars. It must be noted that to get to this point, the umpire did have to remind the French commanders that whilst you may wish to target counter battery fire against the (rather ineffectual) rebel guns, if the dudes right in front of you are shooting seven shades of merde out of you, a re-appraisal of your targeting priorities may be in order. So they did. And within a turn or two, the rebel forces discovered they needed a recruiting drive.

It got a bit dicey in the middle. Geddit? Dicey? Oh, why do I bother?

Additional French armour (I know, but they're not tanks and they're not 4-door sedans either) on their left supported the wavering Para Hussars, who by this point were down something like a third of their original force and had decided to call it a day. The appearance of a Shilka also persuaded them that it was getting a tad hot for the infantry even in cover. The additional HE and MG fire of these new troops (and those very handy Mephisto's) put paid to that brief fight back and despite moving the last of his heavy reserves to the centre, Jim decided to call it a day. 

It would have been even dicier here, but there was a zebra crossing...

It had been a hard fight and both sides took what each would consider serious losses. Such is the nature of the Team Yankee system and I did plan the game to ensure that it lasted more than an hour or so. 

They took the hill just to get a fantastic view of all those fresh-faced militia.

Some notes on the game rules and mechanics. 

Artillery, mortar and rifle grenade fire zones were ad-hoc - they had to be as TY only covers arty as far as I know and I wanted the effect to be uniform across all forms of arcing fire. Hit and save rolls were as per the rules. 

I probably made the militia too hard, making them equivalent to Warpac conscripts minus one on everything, and even then, they were bloody hard to shift. Maybe something to amend the next time we try this scenario. 

Points system - didn't use it as noted above. This was a demo game that had to last about four hours, and in previous playthroughs, Team Yankee is a very quick system of play. This was why the instructions to all players was: if you have it in the box, it can go on the table. They're your forces, you decide what you want and where to put them - within the limits already detailed. 

As for the scenario, if Jim hadn't taken note of the ability to flood the middle third of the table with (unseen and unplaced) militia, it could have been a very different game. Possibly the addition of some observation rules might be in order as I am not a fan of the way TY handles ambushes so ignored those for this game. There again, different theatre, different tactics. 

On the whole, this was a fun game to run and the participants said they enjoyed themselves, even if the umpire did live up to expectations and was a bit of a twat - tee hee hee! I would expect no less from them in the games they run! There were thoughts about changes and modifications to be made but, on the whole, it worked reasonably well. 

The Battleground Show itself was also rather good, and certainly seemed to be well-attended once the doors opened. No fault can be found with the organisation nor the venue, so well done to Pendraken for putting the show on. There are also internal TWAT discussions about attending next year for another demo if they'll have us. If I am running it again, then no doubt there will be a repeat of this TIT for TWATS production. 

Sunday, 5 June 2022

Seven Days to the River Rhine... à la française

A small number of members from the TWATS (Tantobie Warfare And Tactical Society) managed to get a Saturday game organised last week and it was my turn in the chair. As it had been a good two and a half years since their last airing, it would be Seven Days to the River Rhine, but in Africa because... why not? Well, it actually gave us a chance to get Shaun's excellent collection of toys out again, with a ton of technicals, some rather spiffing AMX-30B2's and who doesn't like a shiny AMX-10RC? 

Sneaky beggars, hiding behind the tree line

The scenario was a basic one - a bunch of ne'er do wells (led by Andy) were extorting money from the general populous at a nearby crossroads, and the French (captained by Shaun) were going to sort them out. However, our impromptu tax collectors had decided to put some friends on a nearby ridge line and remonstrate vigorously against the armed forces of France. Thusly, an ambush was set up and all that had to be done was get the game started.

La bête noire des français - l'T-12.

Now, I had previously commented that these rules were decent but, given the passage of time, would that remain the case after this play through? Spoilers - not quite. Still, there was soon a column of 10RC's and VAB's motoring towards the technical stoppage. Shaun couldn't see the massed infantry, T55's and a singular T-12 (described as a T55 without the good bits - you might call those good bits the actual tank and the rifling!). It was the latter that opened up first and smartly dispatched a 10RC with a flank shot. The sole Technical with a 106mm recoilless rifle also had a go and scratched the paintwork of another 10RC. At this point, Shaun dismounted his infantry from the VAB's and set up a base of fire. He also called in for reinforcements.

A technical of Technicals?

At the front of the column, there was quite a bit of to-ing and fro-ing, as the three surviving 10RC's started their revenge against the Technicals. This, gentle reader, lasted all of one dice throw, as out of three shots, Shaun fluffed two. Still, one dead Toyota (other vehicle manufacturers are available). Andy replied with some mortar fire from behind the ridge line (a miss), and another shot from that T-12, this time killing a VAB, though to be fair, a sharp stick could probably have done the same job. 

Rouler, rouler, rouler... apologies to Limp Bizkit fans...

Andy decided that he needed to bring his tanks to the ridge to engage the newly arriving French reinforcements - three AMX-10P's supported by a trio of AMX-30B2's. It was at this point he was gently reminded of the T55 main gun depression limits so he couldn't get the mechanised infantry heading his way. The tanks, however, would be fair game.

L'AMX-10RC, c'est mort.

The Technicals were still causing bother, as they tried to use their heavy MG's against the 10RC's. Of the three that fired, two caused paint scratches, the other missed. In response, Shaun demonstrated a superb level of consistency by firing three times and hitting only once again. Le sigh. Meanwhile, Andy had motored up a couple of Technicals to engage the left flank of the advancing French infantry, neatly adding two morale points to the gentlemen of the Legion. They shrugged this off with Gallic flair and continued their advance. 

Right, lads! Let's have 'em! (In French, obviously).

This was getting a tad exciting (maybe you had to be there...) so we decided to break for victuals. As this was at our new venue, Stanley Masonic Hall, this entailed decamping to the nearby Cooplands (Gregg's pastry is just too greasy) and a suitable lining for the stomach was purchased. All the better to soak up the Moretti that was hitting the spot possibly too well...

Un kilometre a pied ca use, ca use; un kilometre a pied ca use les souliers.

Back to the game and we had yet more shooting. The impressively capable bete noire of the French, the T-12, took out another VAB, the mortar finally scored a hit on the infantry, adding another morale point to their tally, and the three T55's on the left engaged the French armour. Once again, the dice rolling was terrible, with both players scoring one out of three and that was in no way good enough, not even for Mr Meatloaf! The effect, however, was akin to eggshells hitting eggshells. With nothing decisive and yet more French forces on the way, Andy was done and planned to withdraw from the field (well, covered pool table top), using the six T55's he had as a covering force. 

In this game, pretty is as pretty does... which is not much.

This was a Technical (see what I did there) militia win, what with the destruction of four French vehicles and scoring worthwhile hits on the de-bussed infantry. The French would, if the game had a) continued longer and b) we were happy just to have a dice rolling contest - no, we were not, have reached the crossroads and seen off the militia but at quite a heavy price, and only because of the flood of armour and mechanised infantry. 

As for revisiting the rules, the activation/reaction process - sounds good. It plays alright (damning with faint praise maybe), but on this particular play through, it slowed things down a lot. May be it was the way we were playing, in which case as umpire, that's on me, but it didn't seem to suit the flow of the game.

Andy had good right to feel down about his tank's lack of depression.

I did need to add a few things here and there since we were, admittedly, playing outside of the expected theme of the rules. It was quickly noticed that infantry very much play second fiddle in the rules, and HMG's on vehicles are practically non-existent - the VAB's had MG's but not according to the rules. Same with the 106mm, so I played with the stats of the Kanonenjagdpanzer. Yes, they're not the same, but that's the benefit of having an umpire-led game. It also helps when, if there is some disagreement with the players, you remind them of the selection of single malts behind the bar that might aid the memory of said umpire. 

The Charge of the Technicals. Great elan, utterly pointless.

Noted, too, was the morale system, in that it doesn't really fit any real world doctrine, so the idea of taking a few hits, pulling back, re-organising and then having another go isn't in the rules at all. You get your morale limit and that's it. 

Having said all of that, it was still a good game and kind of played out how I thought it would. It may well be that in a couple of years, these will come out to play again - the rules that is, Shaun's toys are most certainly to see daylight much sooner. As for the venue, it's good to play in a bar because there is beer and the odd single malt (after the game unfortunately, both Shaun and Andy ignored the hints about helping an ageing umpire remember things!), and there was much conversation had as well - remember, just because it's a wargame doesn't mean to say it can't be a social event too. Finally, apologies for the French used in the post - a near thirty year old GCSE gave way to Google Translate. 

Epilogue (or post credits sequence to the younger readers more familiar with Marvel movies).

Andy has pondered for weeks, trying to figure out the logistics of putting a game with his Shinyloo collection at the current venue, and questions were asked about a larger playing surface. After all, a covered pool table isn't that big. Gimlet eyes were cast over the other tables in the bar, then a short perambulation to the main hall by Andy and I revealed a scene to which Andy's eyes lit up! Nine decently sized tables that could be combined to offer a much larger canvas. The plans for a Shinyloo game were back on!