Showing posts with label Saturday game. Show all posts

Sunday, 5 June 2022

Seven Days to the River Rhine... à la française

A small number of members from the TWATS (Tantobie Warfare And Tactical Society) managed to get a Saturday game organised last week and it was my turn in the chair. As it had been a good two and a half years since their last airing, it would be Seven Days to the River Rhine, but in Africa because... why not? Well, it actually gave us a chance to get Shaun's excellent collection of toys out again, with a ton of technicals, some rather spiffing AMX-30B2's and who doesn't like a shiny AMX-10RC? 

Sneaky beggars, hiding behind the tree line

The scenario was a basic one - a bunch of ne'er do wells (led by Andy) were extorting money from the general populous at a nearby crossroads, and the French (captained by Shaun) were going to sort them out. However, our impromptu tax collectors had decided to put some friends on a nearby ridge line and remonstrate vigorously against the armed forces of France. Thusly, an ambush was set up and all that had to be done was get the game started.

La bête noire des français - l'T-12.

Now, I had previously commented that these rules were decent but, given the passage of time, would that remain the case after this play through? Spoilers - not quite. Still, there was soon a column of 10RC's and VAB's motoring towards the technical stoppage. Shaun couldn't see the massed infantry, T55's and a singular T-12 (described as a T55 without the good bits - you might call those good bits the actual tank and the rifling!). It was the latter that opened up first and smartly dispatched a 10RC with a flank shot. The sole Technical with a 106mm recoilless rifle also had a go and scratched the paintwork of another 10RC. At this point, Shaun dismounted his infantry from the VAB's and set up a base of fire. He also called in for reinforcements.

A technical of Technicals?

At the front of the column, there was quite a bit of to-ing and fro-ing, as the three surviving 10RC's started their revenge against the Technicals. This, gentle reader, lasted all of one dice throw, as out of three shots, Shaun fluffed two. Still, one dead Toyota (other vehicle manufacturers are available). Andy replied with some mortar fire from behind the ridge line (a miss), and another shot from that T-12, this time killing a VAB, though to be fair, a sharp stick could probably have done the same job. 

Rouler, rouler, rouler... apologies to Limp Bizkit fans...

Andy decided that he needed to bring his tanks to the ridge to engage the newly arriving French reinforcements - three AMX-10P's supported by a trio of AMX-30B2's. It was at this point he was gently reminded of the T55 main gun depression limits so he couldn't get the mechanised infantry heading his way. The tanks, however, would be fair game.

L'AMX-10RC, c'est mort.

The Technicals were still causing bother, as they tried to use their heavy MG's against the 10RC's. Of the three that fired, two caused paint scratches, the other missed. In response, Shaun demonstrated a superb level of consistency by firing three times and hitting only once again. Le sigh. Meanwhile, Andy had motored up a couple of Technicals to engage the left flank of the advancing French infantry, neatly adding two morale points to the gentlemen of the Legion. They shrugged this off with Gallic flair and continued their advance. 

Right, lads! Let's have 'em! (In French, obviously).

This was getting a tad exciting (maybe you had to be there...) so we decided to break for victuals. As this was at our new venue, Stanley Masonic Hall, this entailed decamping to the nearby Cooplands (Gregg's pastry is just too greasy) and a suitable lining for the stomach was purchased. All the better to soak up the Moretti that was hitting the spot possibly too well...
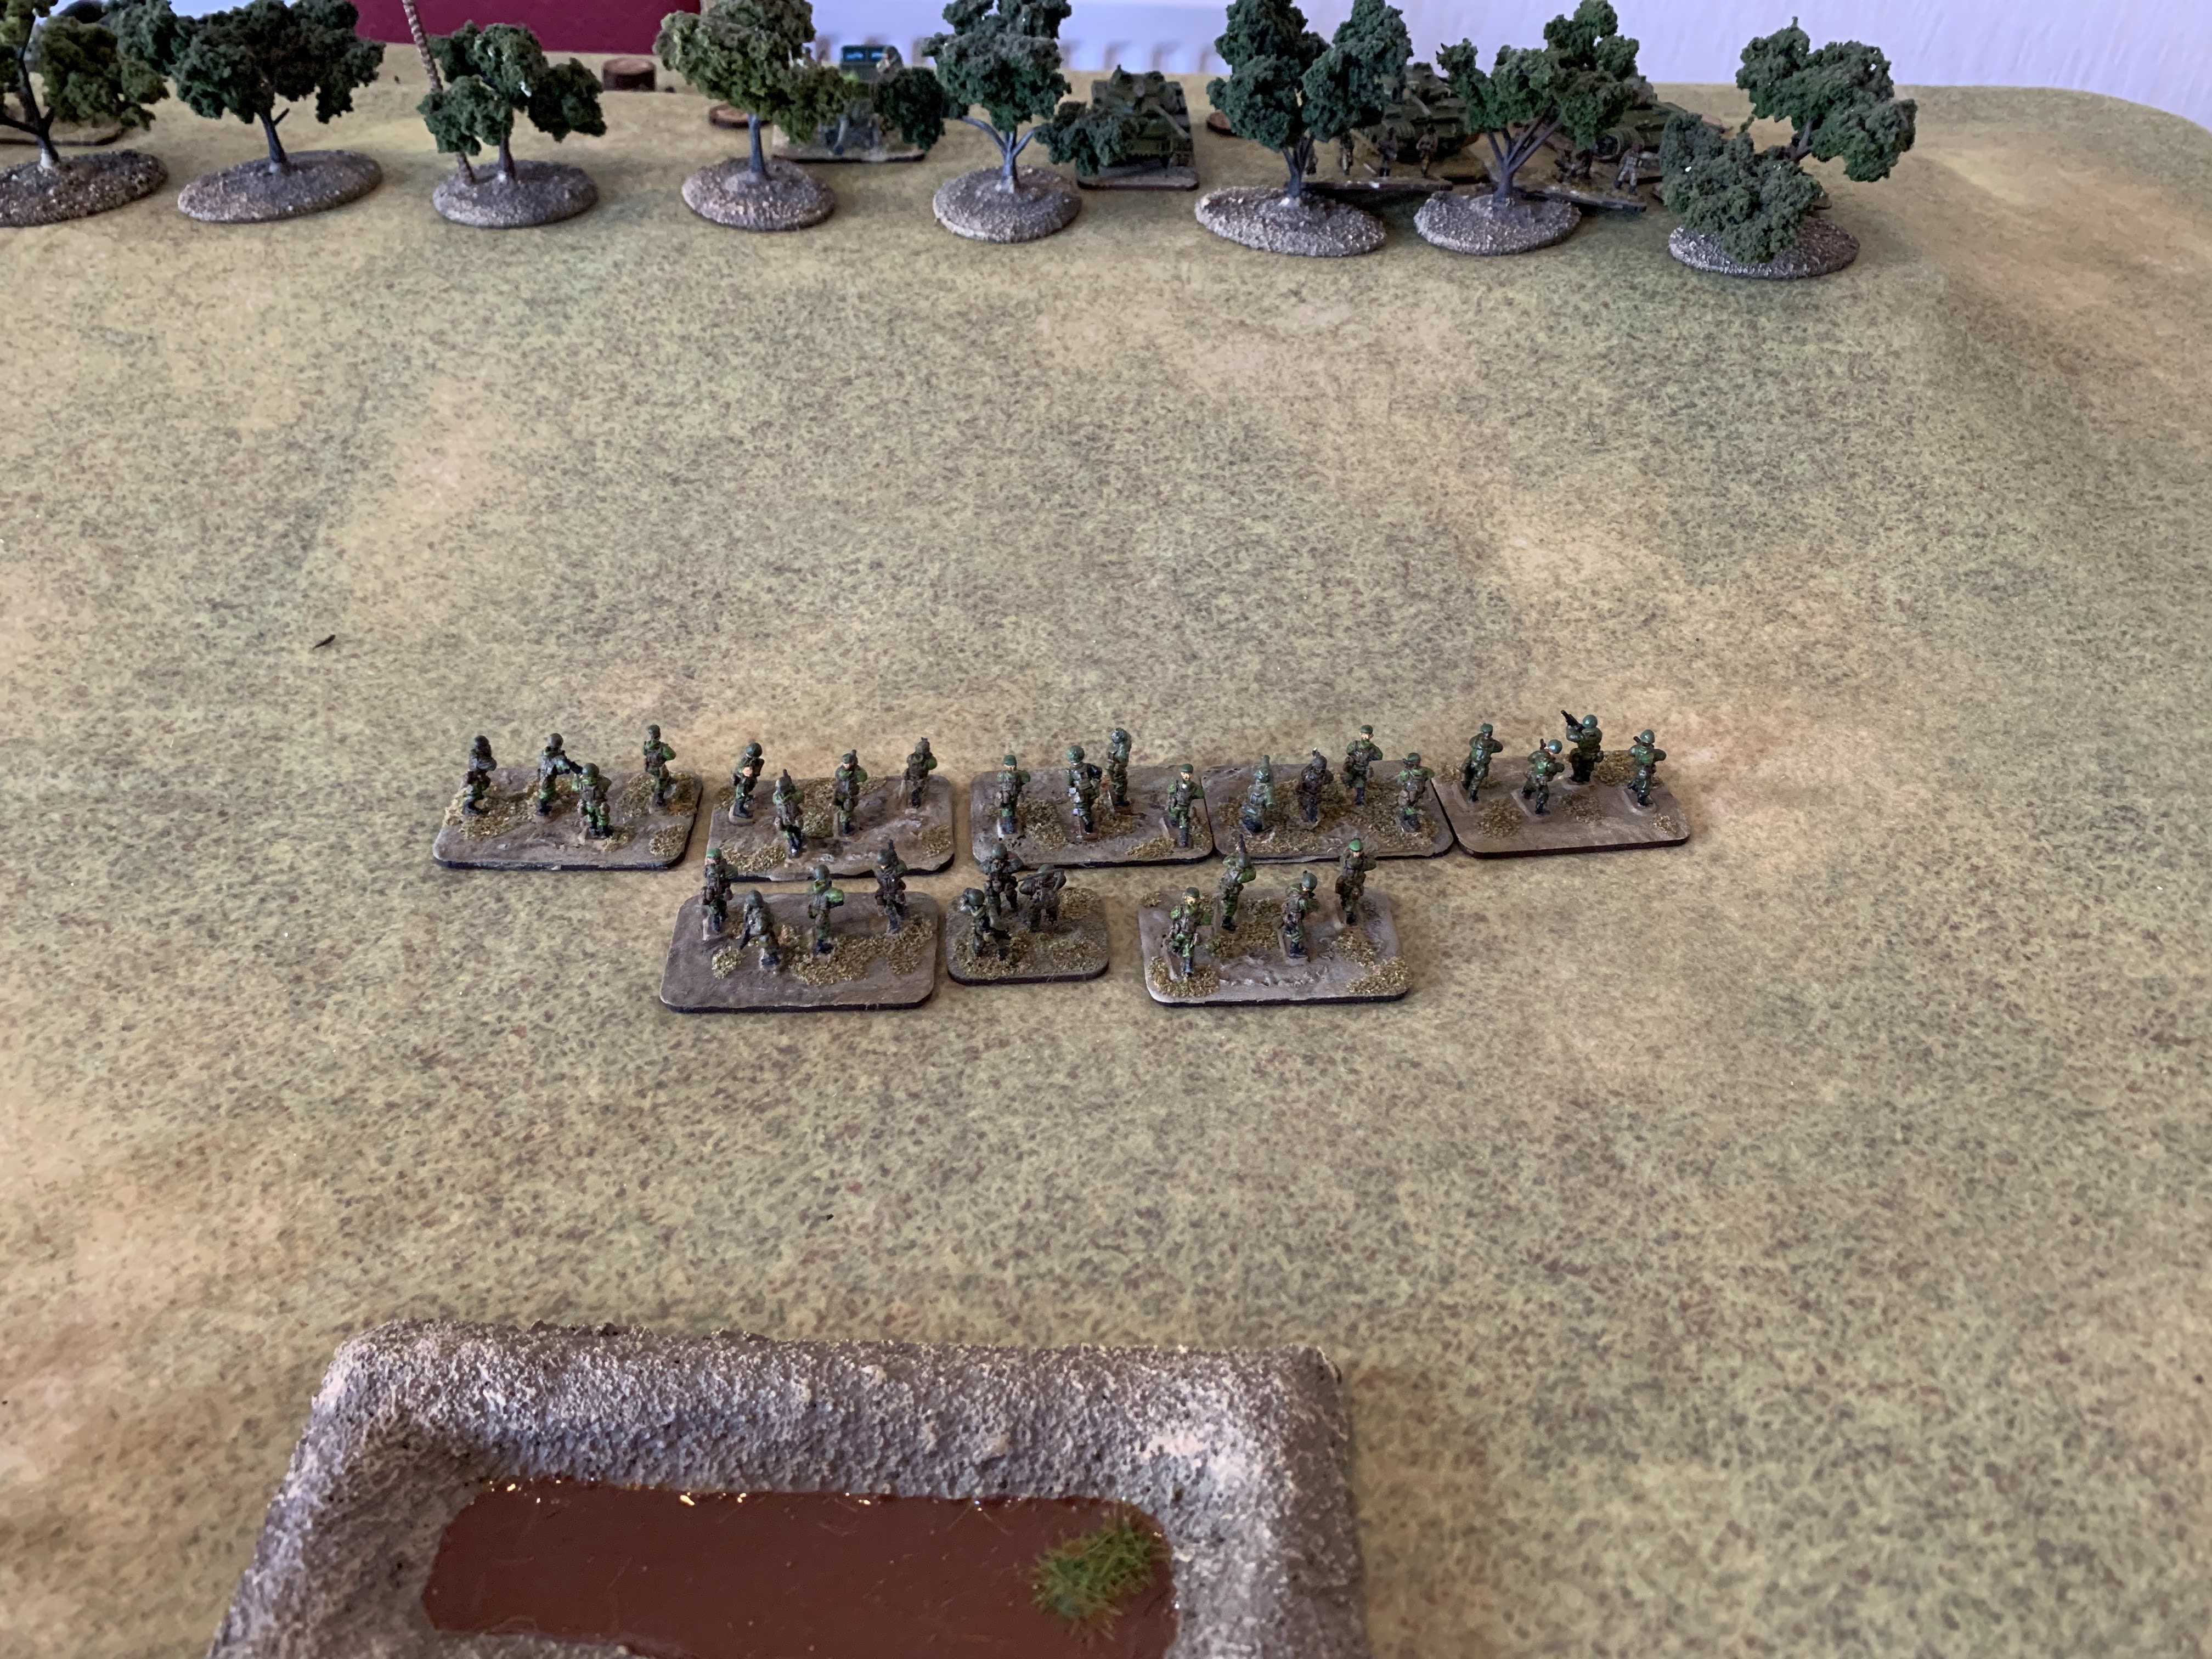
Un kilometre a pied ca use, ca use; un kilometre a pied ca use les souliers.

Back to the game and we had yet more shooting. The impressively capable bete noire of the French, the T-12, took out another VAB, the mortar finally scored a hit on the infantry, adding another morale point to their tally, and the three T55's on the left engaged the French armour. Once again, the dice rolling was terrible, with both players scoring one out of three and that was in no way good enough, not even for Mr Meatloaf! The effect, however, was akin to eggshells hitting eggshells. With nothing decisive and yet more French forces on the way, Andy was done and planned to withdraw from the field (well, covered pool table top), using the six T55's he had as a covering force. 

In this game, pretty is as pretty does... which is not much.

This was a Technical (see what I did there) militia win, what with the destruction of four French vehicles and scoring worthwhile hits on the de-bussed infantry. The French would, if the game had a) continued longer and b) we were happy just to have a dice rolling contest - no, we were not, have reached the crossroads and seen off the militia but at quite a heavy price, and only because of the flood of armour and mechanised infantry. 

As for revisiting the rules, the activation/reaction process - sounds good. It plays alright (damning with faint praise maybe), but on this particular play through, it slowed things down a lot. May be it was the way we were playing, in which case as umpire, that's on me, but it didn't seem to suit the flow of the game.

Andy had good right to feel down about his tank's lack of depression.

I did need to add a few things here and there since we were, admittedly, playing outside of the expected theme of the rules. It was quickly noticed that infantry very much play second fiddle in the rules, and HMG's on vehicles are practically non-existent - the VAB's had MG's but not according to the rules. Same with the 106mm, so I played with the stats of the Kanonenjagdpanzer. Yes, they're not the same, but that's the benefit of having an umpire-led game. It also helps when, if there is some disagreement with the players, you remind them of the selection of single malts behind the bar that might aid the memory of said umpire. 

The Charge of the Technicals. Great elan, utterly pointless.

Noted, too, was the morale system, in that it doesn't really fit any real world doctrine, so the idea of taking a few hits, pulling back, re-organising and then having another go isn't in the rules at all. You get your morale limit and that's it. 

Having said all of that, it was still a good game and kind of played out how I thought it would. It may well be that in a couple of years, these will come out to play again - the rules that is, Shaun's toys are most certainly to see daylight much sooner. As for the venue, it's good to play in a bar because there is beer and the odd single malt (after the game unfortunately, both Shaun and Andy ignored the hints about helping an ageing umpire remember things!), and there was much conversation had as well - remember, just because it's a wargame doesn't mean to say it can't be a social event too. Finally, apologies for the French used in the post - a near thirty year old GCSE gave way to Google Translate. 

Epilogue (or post credits sequence to the younger readers more familiar with Marvel movies).

Andy has pondered for weeks, trying to figure out the logistics of putting a game with his Shinyloo collection at the current venue, and questions were asked about a larger playing surface. After all, a covered pool table isn't that big. Gimlet eyes were cast over the other tables in the bar, then a short perambulation to the main hall by Andy and I revealed a scene to which Andy's eyes lit up! Nine decently sized tables that could be combined to offer a much larger canvas. The plans for a Shinyloo game were back on!

Friday, 1 October 2021

Cruisin' for a bruisin' - game report.

For the second time this year (we truly are spoiling ourselves here), there was an assemblage of Tantobie Warfare And Tactical Society members at The Commie on a Saturday for another afternoon game. Two in two months, I know! I was in the chair for this one and had decided to give the Shipwreck rules another go with some of the rather decent "click together with a dab glue required" ships I'd acquired from Wish a couple of years ago. Markers for missile fire and helicopters, well, good old pen and paper would suffice. Joining me would be Andy and Shaun, neither of whom count modern naval as their thing so this would be a very good example of a game being ran by the umpire.

A life on the ocean wave...

The scenario was US Navy versus the Soviet Navy. Two Tico-class cruisers (Yorktown and Thomas S Gates) escorting a Sacramento-class combat support ship (Seattle) which the Soviets have to stop using two Slava-class cruisers (Slava and Admiral Flota Lobov). There was no air support other than the ship's own helo's, and no submarines either. Andy decided to be a hot dog snaffler for the day, whilst Shaun was already chomping at his pickled beetroot(!). As for the table, this was seven and a half feet by four and a half, so just about enough space for the game. The Americans were tootling along at one end, whilst the Soviet Navy was skulking about some islands at the other.

A note before we get to the game itself - I had hoped that we could get two games in, one as per the rules, the other with some pre-chosen amendments to the shooting mechanics and Aegis use. However, as with all of our games, there was as much convivial social interaction (i.e. talking, gassing, wittering and piss taking) as there was game playing, so only one game was played which meant that I decided towards the end to include one of the amendments anyway (which I'll explain about later). One thing that is essential to the TWATS is that it's not just about playing the game. Indeed, often the game is secondary to the purpose of the gathering. You may disagree and that is totally fine, but we as a group have never been laser-focused on rolling dice. Each to their own, as they say, but then we do hold our gatherings in a pub... with beer... and beef butties. It's how we roll (so to speak...).

They're just a Slava to love...

Anyway, to the game, and the first movement turn was a general US advance, the Seattle between the two Tico's. The Yorktown launched a helo with it's radar on to see what was ahead. It didn't see anything but the radar was detected by the Slava, which had taken up position in one of the channels between the islands whilst the Admiral Lobov had taken the other. Turn two saw the helo move further ahead as the ships from both sides slowly closed the gap. Turn three was pretty much the same, though the Slava did launch it's sole Ka-27, whilst both sides failed to gain/maintain detection. Turn four saw the helo from Yorktown detect the Ka-27, which itself was detected by the Slava due to its radar emissions. 

Turn five saw some juggling of aircraft as the Yorktown's first helo was replaced by it's second. The Thomas S Gates put its first whirly-bird in the air as well, Andy wanting to form a reconnaissance screen ahead of his force. Slava's Ka-27 moved forward, probing with its radar and finding all three US ships. As the Americans were still not radiating, they had to rely on passive means to detect the Ka-27... which the Seattle did but the two very expensive anti-air cruisers didn't. Such are the dice rolls. Andy then decided to switch everything on. The Yorktown detected the Soviet flying menace and promptly fired two Standard surface to air missiles. One hit later and the Soviet helo was no more. 

It's not Harpoon, but it'll do for a map.

Turn six, and things became really interesting as everybody lit up (their radars, there were no smokers in the group). Shaun also launched his last helo, this one from the Admiral Lobov. The Yorktown's helo detected the Slava and was counter-detected, the Thomas S Gate's chopper didn't find the Lobov but neither was it found by the Soviets. At this point, Andy decided to have a pop at the Slava, utilising data links between the ships to fire two Harpoons each from the Tico's at the Soviet cruiser. Onto the combat turns!

The first combat turn (6.1 so to speak) saw the missiles on their way. 6.2 saw the Slava try to detect the missiles as they reached medium range, picking up three of the four and launching a pair of SA-N-6's at each of the incoming missiles. All three of the detected anti-ship missiles were downed. Combat turn 6.3 saw the final Harpoon detected at short range and shot down by another brace of SA-N-6's. 

Andy, at this point, was questioning his ability to actually sink the enemy. There then followed a discussion over tactics, the effect of air power and the differences in approach between the US and Soviet navies on ship to ship combat. Handily, food also arrived at this point: beef sandwiches with fried onions, peas and chips, and lashings of gravy too. Once again, Jean surpassed herself with the victuals. So, fortifying ourselves with another couple of pints of Consett Ale Works Pale Ale (except for poor Shaun, who was drinking lightweight pokey-pola as he was driving), we returned to the table.

Movement turn seven kicked up a gear here. A round of detection dice led to everyone knowing where where everyone else was at with the exception of the Thomas S Gates, who got ignored, and the Slava who seemed to have had dice on his side. Thus began another round of combat turns.

Combat turn 7.1 and it was SAM heaven as the Slava and Admiral Lobov each fired a pair of SA-N-6's, blotting out the two forward deployed US helo's. In return, the Thomas S Gates fired a pair of Standard SM-MR2's at the Lobov's helo, and it too made a rapid connection to the sea. 

Combat turn 7.2 was the biggie, as far as the Americans were concerned. Chastened by his lack of success with a mere four Harpoons earlier in the game, Andy decided to unload his remaining twelve SSM.s (six from the Yorktown, six from the Gates) at the Admiral Lobov. This left Andy with just the Standard SAM's as any long range anti-ship firepower but needs must.

"Authentic" (ahem) wave simulation on the table.

CT 7.3 saw the Lobov detect 8 of the incoming Harpoons, whilst the Slava detected 9. Sadly for the Slava, the geometry wasn't right for any kind of supporting fire so the Lobov had to deal with the incoming on it's own. Firing one SA-N-6 per target to maximise potential hit rolls, Shaun shot down 6 Harpoons. Not bad at all. 

7.4 saw three of the six remaining Harpoons detected and this time Shaun launched a pair of SA-N-6's at each of the offending trio. Two kills, four remaining. It was squeaky bum time for Shaun as the final four made it to very short range and, in keeping with the rules, he couldn't fire anymore SA-N-6's so was left with CIWS and chaff. 7.5 saw detection pick up only three incoming, with dice rolls killing two. With just chaff remaining, Shaun bravely rolled and managed to decoy one last Harpoon away. That final missile slammed into the Admiral Lobov, causing heavy damage and knocking the SA-N-4 system out. Dead in the water, he would need some good repair dice the next turn.

Which, in Movement turn 8, the lucky so and so got! Back up to half speed and with combat systems up and running, the Lobov was back in the fight. A duff round of detection rolls solved nothing, so onto turn 9...

The Yorktown was blind and deaf to anything (it was poor dice rolling again), whilst the Gates found the Slava. The Slava, in turn, found the Yorktown and the Seattle, but not the Gates. Shaun, using some pretty good logical deduction, knew he was facing two shooters and had detected two ships, so decided to fire every SS-N-12 he had (16 from the Slava, 16 from the still functioning Lobov) and see what would happen. 

This does not look good...

Combat turn 9.1, the Yorktown detected half of the incoming raid and the combined fire of 8 Standard MR2's between that ship and the Gates (got to love data links) shot down seven, so 25 remaining. Good shooting but not enough... 

CT 9.2 saw 14 detected out of the 25 and a further 7 kills from nine missile shots, Seattle's Sea Sparrow getting a look in.18 vampires left after short range fire.

Combat turn 9.3 was the very short range engagement and here is where I made the change to the rules. I permitted the Standard's and Seattle's Sea Sparrow to fire again. Some truly excellent dice rolls from Andy took out another 8 of the SS-N-12's, and of the final 10, Phalanx fire from all three ships (who were in close order so I allowed the Gates to fire even though she was not a target) dealt with a further six. Andy really could not have asked for better results. But that still left four missiles aimed at the Yorktown and the Seattle.

And now, the end is near, and so I face the final...

With just chaff left, the luck of the roll left Andy, and all four anti-ship missiles found their target. The two hits on the Yorktown were fatal, sinking her in pretty short order. The Seattle, however, barely flinched, sustaining light damage from the first hit though the second hit raised that to heavy damage, Still, she was afloat. 

By now, the afternoon was waning and the game was over, with a solid win for the Soviets. They had destroyed one cruiser, heavily damaged the supply ship and the Americans only had SAMs to shoot back against two ships. Ok, one of those was damaged but still able to fight. They too, like the Americans, would have to rely upon using SAMs to shoot for any longer range stuff, and they had a definite advantage if it came down to guns.

Both Andy and Shaun enjoyed playing the game, and it was a hoot to umpire too. This is where umpires come into their own, certainly in the games we play, as it is umpire knowledge and understanding that guides players who may not know the period or topic. As for the rules, well, they played well, but seem to be a bit more dice heavy than I would like. Certainly, the detection rolls for missiles could, in my humble opinion, require tweaking. One solution would be to have a single roll at initial detection range and then have that count for the rest of the flight in. If you wanted, you could bring in sea state to make things a tad more realistic and then have a single roll per batch at each range band. Just a thought, but something worth considering as the core rules are pretty sound. 

Then we come to SAM fire (not samphire, though that is lovely on salmon). Aside from the hit values, which in this game I took as absolute, rather than one under to drive off, two under to kill - nope, you get the hit roll, it kills, I have an issue with the way the game handles Aegis. With the Mk26 twin launcher, an early Aegis cruiser can loft four missiles every ten to twelve seconds. According to the rules, they can only fire four missiles per combat turn. That didn't, and still doesn't feel right given that a combat turn can represent one to two minutes of real-time. One way to take that into account was to permit SAM fire in v-short range. The other is to increase the number of missiles fired per turn. The same goes for VLS systems. This part needs work and it'll be something I'll be thinking about before the next time we play this, which admittedly won't be for a while as variety is a plus point to our group. Of course, I could just have mis-understood the rules... another feature of umpire-ran games :-)

Still, this was another good game and one that kind of played out how I expected it to, minus the inevitable tweaking that we always seem to do with rules. Hopefully you have enjoyed reading this and if late Cold War naval is your thing, try and grab a copy of Shipwreck and its add-on Freeplay '88. They're definitely worth a go. 

If you're interested in the ships used, you can find them on Wish, usually for a few quid for 8. I bought two sets, hence the multiple Slava's and Tico's. For the price, they're decent. Now, to find similar scale models to fill out the fleets...

Monday, 30 September 2019

Seven Days to the River Rhine - First Play Through

A week last Saturday saw the assemblage of a small twattery at our usual venue, The Commercial, for a first time play through of Seven Days to the River Rhine. The Cold War is my favourite historical period and these rules, in a similar vein to Team Yankee, aim to provide a suitable game for the 1980's period.The rules themselves are not that expensive and, as noted in a previous post, it's not the usual model catalogue that some companies release under the guise of a rule set.


Joining me were Andy with his modern's and Shaun with his rather significant collection of modern French and Soviet's. With his focus on Africa, this meant a ton of T-55's and BTR-60's. Before I go on, I will point out that the photographs taken of the game are not of the best quality, the lighting being of particularly poor quality and I've not had the time to play around with them in an editor.

The scenario was a return to H'irraq, our regular modern location. UN forces were watching the border between H'irraq and H'irran, securing local oil facilities and the nearby town from H'irranian backed militia and any formal attempt by H'iranian forces to annex some territory.

Hill One to the left, Two to the right.
The British were leaving their border posts, having been replaced by a company of French infantry with some armour support. The British occupied a town at the far end of the table (3 x Challengers, 3 x Warriors, 6 x infantry stands). The French held the two hills separated by a valley that was the main axis to the Oyston Oil facility in the middle of the table and the main road that led to the town. The French were split pretty evenly between the hills, a total of five AMX-10P's and eight infantry stands, whilst three AMX-10RC's covered the gap and six AMX-30S MBT's split into two three-tank units were further back. As these were mostly Shaun's toys, he got to play with them.

Skulky McSkulkface...
Andy was the opposition and started the game with one stand of militia which he placed in some handy cover behind the French front line. Unfair, I know, but the plan was to begin with an uprising and see how Shaun reacted. Once the uprising had started, then Andy would get more gear on the table in the form of 10 militia T-55's, 6 BTR-60's and 24 infantry stands to add to the initial rabble of 10 Skulking Militia. As I was the umpire, I accepted the role of being a twat and didn't tell Andy when he would get the additional troops, or Shaun that there were more British due once the word got out. Nor was Andy told when the regular H'irranian forces would arrive. The goal of the uprising was to take the oil facility and the town. Very asymmetric to begin with but I hope you can see what I was trying to do in simulating limited effective communications between forces in the heat of battle.


As you may have noticed, this was not the traditional Seven Days scenario and there was a smidge of umpire decision making throughout the game but since the first play through of a rule set is to ascertain if the mechanisms themselves are usable, that wasn't much of a problem. It did, however, mean that the tactical advantage cards were unused on this occasion.

Charge!
With everything set up, off we went with the first initiative dice roll. This went to Shaun who, with nothing much to do, handed this to Andy. The Skulking Militia opened up at the nearest group of three AMX-30S's and killed one, giving a second tank a morale marker.

Turn two saw Shaun deal with the morale issue but using up a number of command points in doing so. Returning fire on the Skulking Militia saw morale markers on two militia stands whilst a tactical withdrawal was made to get out of range of the effective RPG fire. He also reversed two AMX-10P's on Hill One and scored two more hits on the Skulking Militia.

Those 8-inch shell splash markers do come in handy...
Andy, however, having kicked off the fight, now had his militia armour to play with and a sudden charge to the base of Hill One with a total of six T-55's and three BTR-60's. Shaun failed in his reaction rolls from Hill One but supporting fire from Hill Two saw a dead T-55 and a dead BTR-60, whose infantry managed to de-bus but with maximum morale markers. Shaun also moved the British Warriors up from the town to support the engaged AMX-30 unit and the AMX-10RC unit moved towards the gap between the hills to cover any move there.

All is not well on that hill...
Turn three saw the 10RC's reach the gap and the Warriors stop to engage the now extremely Skulking Militia. It was on Hill One that most of the action happened. Andy managed to crest the hill with two T-55's whilst his infantry de-bussed from the surviving BTR's and advanced. French fire from Hill One was ineffective with no armour penetration on the T-55's from infantry LAW fire, whilst an AMX-10P was taken out by a T-55.

It was then that Andy used four of his militia T-55's to try and take out the advancing French "tanks". Note, gentle reader, that he called them tanks. It mattered not to Shaun that the three AMX-10RC's were little more than an engine wrapped in tin-foil with a 105mm gun. Nope, he was just happy they had been called tanks! Well, as the umpire, I was looking forward to see what would happen here. It would the sign of a "good game, good game" for Andy if he neutralised the French reaction force (You'll see what I mean in a minute!). The 10RC's required a 5 or more to be hit, so Andy started rolling. A 1. Next dice: higher than a 1? A 2! Next dice: higher than a 2? A 3! Final dice: higher than a 3? A 4! Much laughter ensued but as you can clearly see, Andy was not playing his cards right! Not that it mattered, as the French reply was equally as bad and some truly bum dice rolling was seen. The support fire from Hill Two was also a swing and a miss, whilst continued French fire on the Skulking Militia added another morale marker.

1, 2, 3, 4... Damn it!
Turn four saw the climax of the battle (and it was getting quite late in the afternoon). The militia finally took Hill One but not before losing a T-55 to a flank LAW shot from the retiring surviving French infantry whilst the 10RC's finally paid the ultimate price but not before killing one of the attacking T-55's. A cheeky T-55 shot from the hill even took out an AMX-30S near the oil facility! The advance elements of the H'irranian army were added to the table whilst an additional British Challenger unit also entered the town.

Les braves Chars, ils sont morts!
I called the end of the game as a draw as, whilst one of the hills had been taken, the other hill remained resolutely in French hands and there was much more support coming up. Publicly, the H'rranians were never there whilst the UN forces had been given a bloody nose. Of the game itself, it was nice to have a game where equipment wise, everyone was pretty much even. I am sure that if the Challengers had arrived, it would have been a bit more one-sided. A note on accessories. We had no markers specific to the game so some 8-inch shell splashes were used to denote hits, with dice used to show morale markers. The usual trees and buildings were kindly supplied by Andy but sadly he forgot to bring hills. The solution? Well, as we were in a pub, there were several handy bar trays that sufficed as ad-hoc terrain under the cloth. We didn't even have to pay for the hire! As always, Eric and Jean sold copious amounts of Consett Ale Works' Consett Pale Ale and the ever-beautiful Beef Butties and Chips (with peas this time, a lovely addition!).

That last T-55 was a bit cheeky!
So, about the rules. I like them. They play quite freely and there didn't seem to be anything majorly wrong with them. The initiative system, which I had my doubts about, works well enough but is far better suited to games that use smaller sized units, company size and smaller. The potential change in initiative in each turn does limit grand scale thinking, though as noted in the rules, the game is suited to a large number of players with set overall commanders and if we had the numbers, the initiative swapping could work out better. I have no doubt these will come out to play again and, given a Cold War hot scenario (I am thinking Steve's excellent 20mm collection here), the tactical advantage cards will be added to the mix. There was some discussion about how you would add troop quality to the game (aside from the cards) and minor amendments to the number of command points handed to each commander would suit that. In this game, that would have meant the militia and French each getting their assigned number of points with the French gaining a few more because of training and doctrinal advantages. How many points? Well, that would be decided by creating a table for each of the forces you can play in the game but it's something that we'll look into. Overall, I am happy with the set and pleased I picked up a copy.


Wednesday, 23 January 2019

A kick in the Spratleys

Saturday saw another gathering of the TWATS, again in reduced numbers due to work and personal commitments. I was in the chair and had decided to give Shipwreck an airing. I’d bought this rule set years ago, alongside the Freeplay ‘88 supplement but never got round to putting anything on the table,,, as I hadn’t anything to put on the table. However, last year I bought an 8 pack of snap together plastic ships off Wish. The eight ships included are the Hood, the Liaoning, a Type 54A frigate, a Burke-class destroyer, a Tico-class cruiser, a Slava-class cruiser, a Sacramento-class supply ship and what the packaging refers to as a Kilo-class sub but I think it’s a Seawolf-class SSN. Quite liking these, I bought another pack from Amazon in December. In each instance, the price was just over a tenner for the eight. With these, I could put a game on.
The toys for the game
Joining me on Saturday were Shaun and Andy, who played as the Chinese and Americans respectively. The scenario was a simple one: a US Navy supply ship, the John Lewis (wait, there’s more) is damaged and drifting after a typhoon savaged the area. The Chinese have claimed the waters as theirs and the US Navy believe they are international waters. The Americans have dispatched a surface group of one Tico (the John James Fenwick) and two Burke-class destroyers (The Thomas Marks and Michael Spencer – told you there was more). The Chinese were heading to the Lewis with the Liaoning freshly out of trials accompanied by two Type 54A frigates. Due to the poor weather, there were no flight ops (in other words, I have no models yet for helo’s – that will change). In addition, there was a Russian Slava-class cruiser in the area due to meet up with the Chinese for joint exercises after the two countries signed a friendship pact.

The US Task Force as the game started
The set-up gave the Chinese a bit of a head start in the race to the Lewis but both sides started at flank speed for the first few turns. The Lewis was using its radar and data-link to keep the US group informed of the Chinese location, whilst the Fenwick alone had its radar active – the destroyers Marks and Spencer were under full EMCON. As the two forces approached the Lewis (and each other), the Americans were very vocal in telling the Chinese they were in international waters on a rescue mission. The Chinese in turn were pretty loud in proclaiming their socialist friendliness and willingness to escort the Lewis to a Chinese port since they were in Chinese waters.

The Chinese Squadron
As the ships closed the distance, the Americans detected the Chinese force first, the two Type 54A’s ahead of the carrier. I made Shaun roll for the Slava to make an appearance, which it didn’t.
In turn 6, the Chinese declared they were going to have to board the Lewis in order to "rescue" the crew. The Americans did not take this well.

The Chinese frigates surge ahead, the John Lewis in the distance

Turn seven saw the Chinese get painted by the Lewis’s fire control radars for their Sea Sparrow missiles. Whilst not dedicated anti-ship missiles, they could still cause some damage. The Chinese ignored this and approached closer still, though by this point, they had activated their radars and finally saw the Fenwick and her escorts. As an aside for our northern England readers, rumours that the Fenwick was equipped with an advanced chaff substitute called Window were just that, rumours, though the thought of Fenwick’s Window being a distracting was quite apt.
The Americans, and rough seas for the Spencer
Turn 9, and the US commander at sea gets a message from Pacific Fleet Command – the Chinese should not get closer than 3 miles and that permission to fire was granted. Of course, when told this, Shaun brought one of his 54A’s to within one mile. Finally, some shooting started.

Closer...

Closer still...

Very close now...

Dude! Personal space!!!
Now, I quite like Shipwreck’s mechanic of movement turns lasting 10 minutes of game time but when firing occurs, this is sorted out in up to six combat turns before another movement turn can be started. It neatly takes into account missile speed and distance as well as being neat when trying to figure out what is going on. Needing relatively low dice to get hits due to the way the Sea Sparrows were balanced for anti-ship use, Andy fired to at the closest 54A and missed. Similarly, an attempt at Phalanx fire also failed, though that was more of a desperation shot. Once that had been decided, it was the next movement turn.

"Western belligerence" was claimed by the Chinese, as they launched boats with marines on to grab what they could from the Lewis. When asked what kind of boats they would be (as there were no models for them), the reply of "don’t know but don’t say they are from Taiwan or we will fire" seemed very apt. The Americans were given the all clear to fire at will (poor lad) and the Fenwick and Marks each launched four Harpoons at the two frigates. The Lewis joined in with its remaining 6 Sea Sparrows at the the nearest frigate. It must be noted here that the Liaoning was keep its distance. The remaining frigate tried its hand with 76mm cannon fire against the Lewis and missed. Both, however, unleashed their entire payload of 8 C802 missiles each at the Americans, divided equally between the Fenwick and the Marks.

Vampire, vampire, vampire!
Another intermission here as I kind of cocked up. I didn’t read the ship cards properly which limited the number of SAM’s that could be guided at any one time. However, my defence is that modern day Standard missile/AEGIS combo’s are much more effective than even these rules have them (originally written in 1999) so I let both sides fire whatever they wanted at their respective incoming targets. So let that be a lesson, when you cock up, cock up so that both sides are receive a fair benefit of the cock up.

Another shot of the missile action.

Pretty fair exchange here
So, the first set of SAM’s went up. Andy fired three Standards per incoming missile so 24 from Marks and Spencer. Even with a miscounted points value (again, my cock up but again, fair to each side), all but one of the C802’s was shot down. In response, the Chinese only managed to down five of the eight incoming Harpoons. Final result – one hit on the Marks, one hit on the port Type 54A and two on the other. The 54A with one hit took light damage and lost it’s now empty C802 mount. The other 54A took a crippling hit first, then sunk with the second hit. The Marks took it’s hit head on, leaving it crippled and down a Phalanx mount.

At this point, I enacted the third rule of the TWATS. The first one is "The umpire is always right, especially when he’s wrong". The second is "refer to rule one" and the third is "the umpire is a TWAT". And so I was. I took Shaun to one side and asked him if he wanted to call upon the Russians for help. He said yes, so on one corner of the table, the Slava appeared as did four missile tokens, each one representing four SSM’s. Yep, the Slava had shot its entire load, eight at the Spencer and eight at the Fenwick.

Ain't I a stinker!
Onto turn ten and the remaining 54A tried again with its 76mm to hit the Lewis, more bum dice here from Shaun. An emergency message from the Varyag claimed that an unfortunate error had meant the launch of all of the Varyag’s SSM’s. Totally an accident and unintended(!). However, whilst Andy was prepared to rescue survivors from the sunk 54A, he knew he had been well and truly kippered. Not that this was to stop him. Cleverly (and totally unintentionally), he bypassed the multiple missiles per target rule and had the Spencer and Fenwick each fire one SAM per incoming missile. As each ship was acting individually, I ruled that this would have no effect on the accuracy of the missiles and with a total of 32 against 16, the incoming Russian barrage was dealt with smartly. At the end of this combat round, a quick check of the ammunition situation revealed that the Fenwick was down to 106 SAM’s and the Spencer down to just 34!

Turn 11 saw the Russians once again claim a technical malfunction and also making a pretty sharpish withdrawal. Whatever the agreement between the two governments, there was little appetite for a further missile exchange, especially as the Americans still had a good number of Harpoons left. The surviving 54A also turned tail and joined the Liaoning in leaving the combat area, not even helping to rescue their own sailors, something the John Lewis was more than willing to do. Everything else would be sorted out at the UN.

The first run for a rule set is always just a case of seeing if the game mechanics work. In the case of Shipwreck, whilst the scenario was simple, it revealed that they aren’t half bad and with a little updating to to take into account current day weapons capabilities, will see future use. One thing that was remarked upon was the possibility of adding politics to mix. Several years ago, Andy and I ran a political game set in "not Iraq", with multiple sides and backstabbing a plenty. Something like that, with ulterior motives and the like would suit this well as it would add an extra layer to just rolling for missile fire – indeed, once the missiles start flying, there is not much more to do than hope you get good AA fire rolls. We would need more players (the previous political game had 9 including the two umpires), but in that case, it would be one player captains one ship with national orders assigned to each ship captain. Hmmm, with a bit of thought, that could be a go-er.

One thing that will be added to (after the York Vapnartak show) are helicopters. Tumbling Dice do a good range and whilst they are light on Chinese types, that can be worked around. They would also give a bit more subtlety to the hunt. Some fixed wing would also not go amiss, especially with the carrier. This could even lead to a campaign…

Some of you might be thinking, having seen the pictures that the scale of the models looks wrong. And to be fair, they all seem to be scaled so that the actual model size is about four inches. True, that leads to some funny looking size comparisons but to be honest, it wasn’t an issue here as the all measurements were made bow to bow. The models themselves are quite decent and when you consider how much I paid for them, it was enough to put on a game. True, the painting is a bit iffy and some of the fittings were rough and included a fair amount of flash on some of the pieces, but for the price, it would be churlish to complain. Main take away here is that it doesn’t have to cost the earth to put a game on and they made a decent impression on the (green) sea – a props issue that made not much difference to be honest. They were also easily visible, something that smaller scale ships would cause trouble with in the slightly gloomy light as the afternoon waned.

All told, I enjoyed this game. It was nice to try something different and there is room for expansion later on. Both participants also enjoyed it (so they tell me, though they both were well versed in political double speak by the end of the game :-)). As always, the fine hospitality of Eric and Jean at the Commercial was much appreciated, as was the Consett Ale, and the Beef Butties and Chips were well served. Empty plates and full stomachs all round and a satisfying afternoon of gaming.

Note: For non-UK readers, Marks and Spencer, John Lewis and Fenwicks are the names of department stores in UK. Fenwicks is particularly popular in the north-east of England for its Newcastle store where a large Christmas display window (hence the chaff/window reference) is set up each year. And yes, bad jokes will continue is future games I run :-).

Wednesday, 5 September 2018

Team Yankee - Amendments

I have had a couple of requests to share the amendments that I have made to the Team Yankee rules, so here they are. A couple of points to note first. These are amendments that we have play-tested. There are more on the way, some of which are fully formed, some which are just thoughts at the moment, but in any case, until they have been used in a live game, I'm not going to detail them here. That can be for a future post. Secondly, the amendments were made so that the game played in what I believed to be a more nuanced manner. As such, you may (should, and indeed, will) disagree with some of the changes made. That's a good thing and I welcome comments, suggestions and points of view.

Playing Team Yankee for the first time was an enlightening experience. Very different from our usual moderns rule set (Combined Arms), TY was a fast paced and rather bloody game and this raised some questions. Undoubtedly, it filled an afternoon, but what it lacked was a sense of satisfaction. It was too lightweight, too gamesy. So here we are.

Can't fault the production values...
The first thing that I changed was the hit values on the main battle tanks. This was to counter the "BANG, You're dead!" style of game play and to bring a dose of reality to the table. Modern MBT's can take some punishment and I wanted to reflect that in the game. Once a hit was scored, I made the player roll for hull or turret. If the hit was on the hull, another dice roll decided if the tracks were hit (1 or a 6) or the main body (2 to 5). A hit to the tracks created a mobility kill which meant the tank could still fight but not move. If a turret hit, then a roll decided if it was main armour (1-2 and 5-6) or mantlet (3 and 4). Take the Leopard 2 for example: the sighting system carves out a great chunk of the turret front. For tanks with Chobham type armour, their values were inflated too. Again, with the Leopard 2, the frontal armour went from a flat 18 to 24/18/24 (right panel/mantlet/left panel). This meant that a T-72 hit (with a value of 22) could kill with one shot but it wasn't a certainty. I also added a rule that if one section of the armour was hit and the tank survived, that section was now rated down to the weakest level on the front of the tank (18 in this instance), meaning a second shot on the same area had more of a chance of destroying the tank but allowed the game to reflect that the armour was doing what it does in the real world. In the same vein, Soviet vehicles fitted with Explosive Reactive Armour resulted in a temporarily higher defense value, but if hit and the armour saves the tank, the original armour value comes into play as that panel has now been used.

After the armour came the bailing out rules. A previous comment on the Durham post tried to clarify that the rules don't necessarily mean bailing out, just a possibly short term effect that can be recovered from. Me, I take the direct English here and the rules say bailing out and re-mounting. I changed this by asking if the crew wanted to bail and if they did, and the enemy were in MG or small arms range, they would have to deal with incoming fire. Any hits rendered the crew out of action.

The assault rules were also looked at. No more bouncing back. If you failed to pass over an obstacle, you got stuck, effectively giving yourself a mobility kill. Speaking of obstacles, if fording, Soviet crews had to roll a D6 and if they got a 1, their engine stalled. Rolling another D6 and another 1 led to the engine compartment flooding. This was, apparently, quite common and river obstacles were only traversed during exercises by vehicles equipped with radios in case such events happened. Probably not the same possibility as the two D6 roll gives but it adds a bit of flavour.

Ranges were next examined after the Durham game and the following were put in place for the most recent one:


Allies

L30 120 mm = 60 inches – 3000m
7.62mm MG = 16 inches – 800m
30mm Rarden = 30 inches – 1500m
SA80 = 8 inches – 400m
MBT LAW = 1 to 20 inches – 50 to 1000m
Hellfire = 10 to 160 inches (500m to 8000m)
Javelin = up to 50 inches – 2500m
30mm Avenger – 24 inches = 1200m
Maverick = off the table

H’aarqui


T72 125mm = 50 inches – 2500m
12.7mm = 20 inches – 1000m
AK47 = 7 inches – 350m
73mm cannon = 10 inches – 500m
30mm cannon = 30 inches (armour) 80 inches (ground 1500m and 4000m
AT3 Sagger = 10 to 60 inches – 500m to 3000m
AT5 Spanderl = 2 to 80 inches – 100 to 4000m
SA-9 = up to 84 inches – 4200m

Whilst not 100% accurate, they are close enough and now fit in relation to each other. Additional calculations were used for the effect of 30mm Avenger fire, based on the A-10 travelling at 400 knots, covering 175m/s (so 3 inches). A one second burst when used for strafing would cover 3 inches, a two second burst covering 6 inches and so on. This led to ammunition rules so the A-10 was limited to 5 one second bursts. In the same vein, armoured vehicles firing MG's had a maximum of three consecutive turns before rolling for heat-related jams (1-3 jammed, 4-6 ok).

Aircraft were also changed and can loiter for as long as five turns before fuel becomes an issue and removes them from the table. Naturally, if you have weapons that can shoot at them, if the aircraft is on the table, they are a target.

Finally, artillery. Well, mortars so far. Instead of an over-priced piece of plastic, I used the ground scale. One mortar with observed fire could accurately hit a 50 x 50m square (1 inch by 1 inch). Hit rules remain the same and I'll look at battery fire later on. This makes mortar fire more of the pin-point weapon it should be and forces the player to think about target selection.

It may seem that this puts a heavy responsibility on the game umpire to keep track of things and yes, you'd be right. Our group uses the umpire system as it fits in well with our outlook of the hobby and , for one, quite enjoy umpiring now and again as it's something different.

As I have said above, any comments, queries and suggestions are most welcome and I'll try and reply to each in turn.

Saturday, 1 September 2018

Sarge! This f***ing f***er's f***ing f***ed!

So rang out the cry from "Wor Lass", the lead Challenger 2 of the Prince Regent's Own Heavy Hussars as its crew took stock after an IED forced them off the main causeway to the Harraqui provincial capital of Q'uon-Shett. The British advance had been halted and recovery crews had taken heavy fire from Harraqui militia forces positioned in the nearby marshes. It was now a race against time. Could the British re-group and rescue the beleaguered tank and its crew, or would they be taken by the fanatical defenders?

So lonely, oh so lonely...
Such was the scenario last Saturday when a trio of TWATS converged on the Commercial pub for a game. I was running it (using Team Yankee again, with not only the revisions added for the Durham show but also revised ranges and artillery rules), Andy played the hapless British and Shaun took on the Harraqui's. Now, being the umpire (and a twat), I chose to make things difficult for both players. Andy had the disabled Charlie 2 and a single Snatch Landrover, the rest of the British forces re-organising for a recovery attempt, whilst Shaun had two groups of militia, a group of tooled up Technicals and a quartet of T-55's. The issue he had was that the Technicals and T-55's needed to be told of the British plight and a pair of motorcycle dispatchers were required. Oh, and there were some victory rules - Andy had to get the tank crew (and the tank if possible as they only have 226 left) out of trouble. Shaun had to capture the tank crew alive for propaganda purposes, so he couldn't shoot "Wor Lass", however tempted he might have been. With the scenario set, off we went.

Shaun started off with dispatching the motorcyclists to get help. Andy brought up his Landrover and laid suppressing fire on the western militia group to the rear of "Wor Lass". The crew of "Wor Lass" were no less busy laying down accurate fire from both co-ax and cupola MG's on the eastern group, causing the first militia casualties. A roll for the appearance of the A-10 failed.

In no way endorsed by the Consett Ale Company
Turn two saw a kill for the Landrover crew with their .50-cal and another dead militiaman on the  east. The motorcyclists continued their weekend ride towards Q'uon-Shett. Still no A-10.

Still lonely, oh so f***ing lonely...
Turn three, and still no air support. Another casualty either side of the causeway on the militia and things were looking a tad brighter for the British - until your humble Umpire made them roll for their MG's jamming. After sustained fire, it might be expected that some of the guns would be running hot. A simple 1-3 fail/4-6 pass saw Andy roll well and the MG fire continued. Also at this point, the first of the British support appeared, (the British having superior comms) - three Scimitars of the North West Durham Yeomanry (The Commercials) alongside a pair of REME support vehicles.

The AA, REME style (other roadside assistance organisations are available...)
At the start of the fourth turn, the A-10 finally showed up, which was fortunate, as the first rider had reached the Harraqui support forces and the Technicals rolled out. Andy ordered the Scimitar Troop to race up the road; he needed more firepower alongside "Wor Lass" since he now couldn't trust his MG's. He could, however, trust his 120mm L30A1 main gun, so lobbed a HESH round towards the eastern militia group. This killed two, forcing a morale check, which they passed, but were left suppressed. 30mm RARDEN fire from The Commercials killed another militiaman to the west and the A-10, feeling left out, spotted the T-55's and decided a Maverick was called for. Cue one dead T-55.

As close as you'll get to a money shot (special effects courtesy of Flash Gordon).
They look pretty. But pretty is as pretty does...
As the fifth turn started, things quietened down a bit, with another HESH round dispatching two more militia and the A-10's second (and final) Maverick destroying another T-55. You may wonder why only two missiles? That's all the model had, so that's all they could fire. There were still two cluster bombs, two dumb 500lb-ers and two Paveway laser guided bombs plus the internal cannon though, so the A-10 was still in the fight. Renewed MG fire caused no further casualties.

This is not going to end well...
As is always the case in our games, the Umpire can do pretty much what they want as long as it suits the style and period of the game, and as turn six began, the message had gotten through to the regular Harraqui army so they started piling onto the table, looking for a piece of the glory. Three AT-5 equipped BRDM's with an SA-9 SAM launcher in support were the beginning, though the British had also managed to get three Warriors with elements of 69 Commando on the road too. The A-10 was being helpful, dropping a 500-pounder and a cluster bomb on the approaching Technicals, two of which were hit and destroyed. Then things got messy.

Andy had placed The Commercials in front of "Wor Lass", screening her from traffic coming down the causeway. Shaun thought that was a bit cheeky and rolled his two surviving T-55's right up to them. All but one of the remaining Technicals were also jammed in there. Like I said, messy.

Our Eye in the Sky reports heavy traffic on Highway 8
So this is what they call CQB...
The Commercials fired first, the first Scimitar getting two hits on the right-hand T-55 and causing a mobility kill. Second Scimitar was aiming for a Technical and at close range, the 30mm rounds had no issues at all. The third Scimitar engaged the last T-55 and although scoring two good hits on the turret, didn't penetrate the armour. Then came the T-55 reply. Or not, as the case may be. Poor dice rolling saw one Scimitar obliterated but the other shot was a miss. Overall, not as bad as it could have been for The Commercials.

The Aftermath (part one)
Shaun also used this opportunity to fire off his rocket pod equipped Technical. Using a bit of Umpire knowledge and know-how (i.e. making stuff up as I went along - albeit having read and seen how these things have worked in real life and knowing the established ground scale), I let him rip, the effect of which was a lovely piece of churned up causeway, a possibly very relieved Technical operator and not much else.

Turn seven saw more of the British response, with the 69 Commando-laden Warriors advancing further along the causeway and a gaggle of "Wor Lass's" mates (three more Challenger 2's) now on table. The A-10 was once more useful with a 30mm gun run against the two T-55's. This took a little bit of maths and realism. Working out the distance traveled in one second at 400 knots, then the burst length that an A-10 would normally have, then fitting that into the ground scale and finally offering Andy a selection of burst lengths (fire longer, less bursts, fire shorter, more bursts), Andy decided upon an aim point and a one second burst. The T-55's died quickly. The SA-9 was not happy about this and decided the A-10 should leave, but poor dice rolling saw a miss. Not that this was entirely a bad thing as Andy retired the air support out of missile range (effectively off-table).

The Aftermath (part two)
Turn eight and the final one as it transpired. The AT-5 BRDM's came into action and the rest of The Commercial troop died quickly, though not before replying with cannon fire that killed two of their attackers. "Wor Lass" stepped up and finished the last one off. And that was it.

At last...
Why? Well, the British now had enough on the table to support the recovery operation and the surviving Harraqui forces were in no fit state to oppose them. True, there were a nearly a dozen T-72's in a box that could have been put on the table. However, they didn't fit in the scenario (and the Harraqui forces were not in that much of a fighting mood) and it would have devolved into a dice rolling contest for the sake of it. What would be the point of that (apart from "the game, innit" mentality)? As such, a British victory, but a Pyrrhic one. Yes, they saved their tank crew, but lost the Scimitar troop in the process. Honour, however, was maintained.

So, the game organisation. I wanted this to be another example of asymmetric warfare, where both sides have to think carefully. As Andy pointed out at the end of the game, it was effectively over by turn three but neither side realised this. And that is kind of the point. He also commented that if he had made a mistake at any point, it would have been game over for him. That was what I was aiming for, not just a gung-ho "Bang! You're dead" style shoot-em up. No, a bit of finesse here and there does wonders.

As for the rules, the Durham amendments were in place and both artillery and ranges were tweaked, setting a hard 1 inch to 50m scale so that everything worked on that level. Weapons were changed to fit that too, so whilst it meant that missiles could rule the table, it added a dash of realism that TY normally lacks because they want pretty models on the table (so you need to buy them) and you won't get upset when said pretty models are blown away the second they pop their head up (nullifying the reason for buying them in the first place). Should there be more amendments? Yeah, a probability dice could smooth out the decision making process a bit more, and movement ranges need a bit of refining but then what started off as a bit of tinkering is starting to seem like more of a major revision. The point I am making here is that the core mechanics of TY are pretty basic (and have been seen many times in the past) yet they can be fit for purpose depending upon what you want to put on the table. If it's dice rolling a-go-go hour long games then, out of the box, TY will  suit you. If you want something more in line with the real world where you get to choose your tactics and actions (I really don't like how the game mechanics are set up to replicate tactics - surely that is the job of the player???), then it is a decent framework to hang your own amendments off. All it takes is a bit of thought. Speaking of which, the values for vehicles not currently listed in TY were made up by me, using existing values as a guide.

This is the third game I've ran using these rules within the last twelve months and I think they are developing quite well. Certainly there have been no complaints about the changes made and more than a few suggestions which have been, and will be, acted upon. They are turning into something quite respectable for modern wargaming. Then again, I would say that.